- Greenbrae Chair
- Rhomba Bench
- Quadra Fire Cube
- Tripod Stool
- Outdoor Concrete Table
- More Concrete Videos
- Floor Videos
- Countertop Videos
- Outdoor Living Videos
- Furniture Videos
- Demonstration Videos
- Concrete Tool Videos
- Concrete Stain Videos
- Sealer Videos
- Concrete Stencil Videos
- Concrete Stamps Videos
- Surface Preparation Videos
- Concrete Forms Videos
Quadra Fire Cube Design
Quadra Fire Cube Design
Time: 02:36
A video transcript featuring Mike Heidebrink, Cheng Concrete
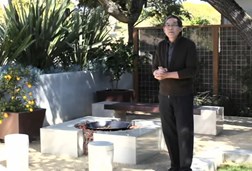
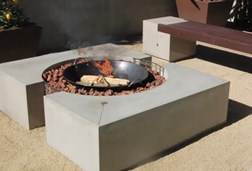
These are outdoor living projects made with CHENG D-FRC. I'd like to introduce you to the Quadra fire cube, by CHENG Concrete.
I designed this so that homeowners like yourself can have really good design that is accessible and, very easy to move around in your yard. And the style is adaptable to any environment. This unit is just made of two forms, cast from one mold with simple volcanic rock put in the center and a store-bought or a restaurant supply house wok simply placed in the center.
These simple components kind of amass together, comprise a look that looks much more permanent than it really is. If you wanted to disassemble this, it would be very easy because each one of these units only weighs 150 pounds because it's made out of our Cheng D-FRC lightweight concrete.
Quadra Fire Cube Forming
Time: 08:41
A video transcript featuring Mike Heidebrink, Cheng Concrete
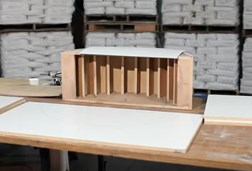
Let's start off by talking about the knockout that I've got here. What this is, basically, is a curved radius that is going to form the interior shape of our fire cube. The way that we built this is basically using a 3/4 inch sheet of plywood that we've gone ahead and cut to create the shape of this knockout. You can see here a couple layers that are laminated to this radius. What these are made up of are a couple items that I want to talk to you about. One is this flexible material called wiggle board. It's basically a plywood that is designed to allow us to create a curve, and we place this right over that radius. It's screwed into that position and that creates a shape to the form that we've already cut into this 3/4 inch plywood.
Quadra Fire Cube Casting
Time: 06:23
A video transcript featuring Mike Heidebrink, Cheng Concrete
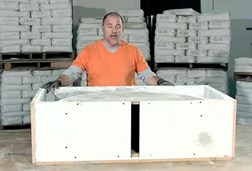
We're all ready to cast the fire cube. Before we do, I want to talk about how we're going to be casting this. I've mixed up 25 pounds of the light casting blend and 25 pounds of the dark casting blend to create a cool gray color, nothing too dark or too light. And we're going to be spraying that into this form to about 1/8 inch thick on all the surfaces. After I'm done spraying the casting blend into this form, then we're going to go ahead and take what's remaining in this bucket, which will probably be about 30 to 40 pounds of material, and I'm going to mix that with another 50 pounds of the backing blend to create a thicker-consistency material to lay up onto the walls and into the base.
Quadra Fire Cube Demolding
Time: 02:42
A video transcript featuring Mike Heidebrink, Cheng Concrete
We're ready to demold the fire cube now. But before we do, I've gone ahead and actually ground down any excess material that was left to be flush with the top of the form. So I've gone all the way around the mold here and the concrete is now flush with the top of the form. We're ready to start unscrewing our wall panels and peeling them off.
For demolding this knockout that we have in here, it's kind of tight and a little tricky to get it removed. I've already removed the screws that were attaching the knockout to the base, and now I've just put a couple sections of foam up against my concrete that I just demolded, and I've braced a 2x4 in front of that. And just by using these C-clamps, or bar clamps, I'm going to tighten this and pull that out of the concrete. Here we go. So now the whole piece is free.
You can find detailed plans and instructions for this fire cube online.
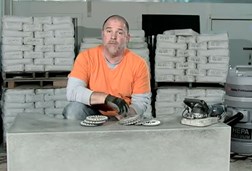
Quadra Fire Cube Polishing
Time: 04:49
A video transcript featuring Mike Heidebrink, Cheng Concrete
Well, we've demolded this; it's completely out of the form. We don't want this kind of matte finish. We want to polish this up to a high gloss. And what I'm going to be using here is Alpha's Universal Polishing System. It starts at a 60 grit and goes all the way up to 3000 grit. Since this fire cube here has only been in the mold 12 hours, the concrete is still probably a little soft, and I'm not going to need a very aggressive pad to polish down into this. So I'm going to start off with a 500 grit and then go up to the 1000 grit, and follow it with the 2000, and finish off with the 3000, to put a really nice, bright polish on the surface.
For the polishing, I'm going to be using my new favorite tool, Alpha's WDP-120 wet or dry polishing system. I'm going to be using it dry, and I've got it hooked into Alpha's HEPA vacuum, which does a great job of capturing dust that's being generated by this. So now I've switched out the 500 pad and I've put on the 1000-grit pad. So we're going to pick up where we left off there.

