-
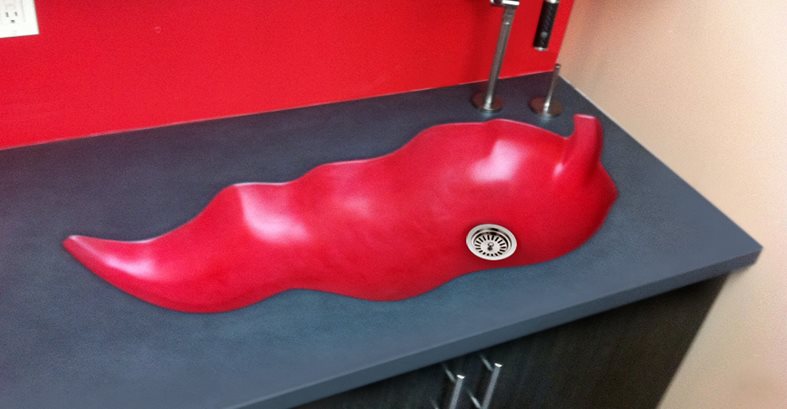
Located in New Jersey, Blair’s Sauces & Snacks is known for their amazing hot sauces and hot snacks. They brew up some extreme sauces, rubs, chips, jerky, salsa, and more. They know hot! When they wanted a custom sink in the shape of their iconic chili pepper logo, they went to the man that knows concrete-Dave Grech at Trueform Concrete.
Collaborating with designer Kim Suchodolsky of Design Alternatives, Dave and his team fabricated the complex and detailed chili pepper sink using GFRC methods. Their step-by-step process is shown here, illustrating the creative methods, tools and techniques they used to make this one-of-a-kind sink.
-
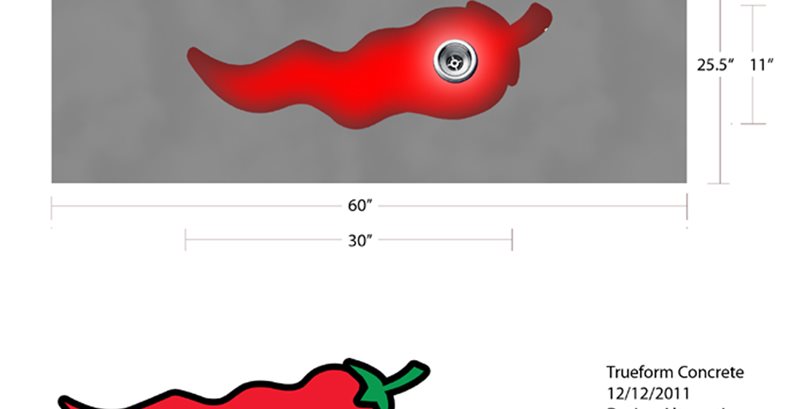
“I thought this would be a fun project and something we’d never done before,” says Dave Grech, owner of Trueform Concrete. He knew casting would be the biggest challenge to bring this themed sink to life. “The first step was to create a scaled version of the pepper out of the image in the logo,” he explains. “We had to enlarge the pepper to be more usable with a faucet and drain, so we rounded out one area more than it shows in the logo. The chili pepper isn’t so tapered as the original inspiration because it needed to work and give room in the sink.”
-
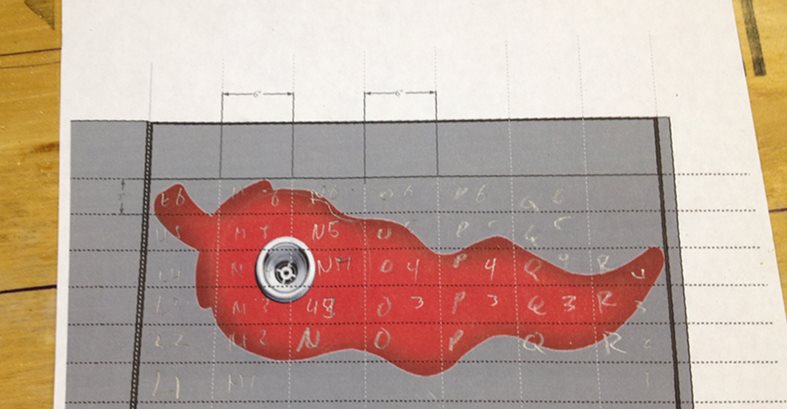
Dave reversed the design and used a grid to enlarge the pepper on a sheet of plywood and keep it in scale. “We could have used a projector and transferred the image to the wood that way. But instead, we enlarged the quadrants of the grid and plotted the proportions by connecting the dots directly on the plywood,” he says.
-
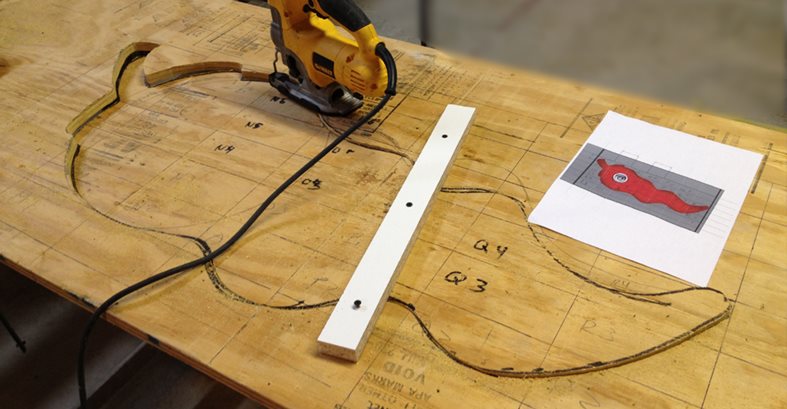
Here, the chili pepper shape has been transferred in real size to the wood and will become the shape master for the mold.
-
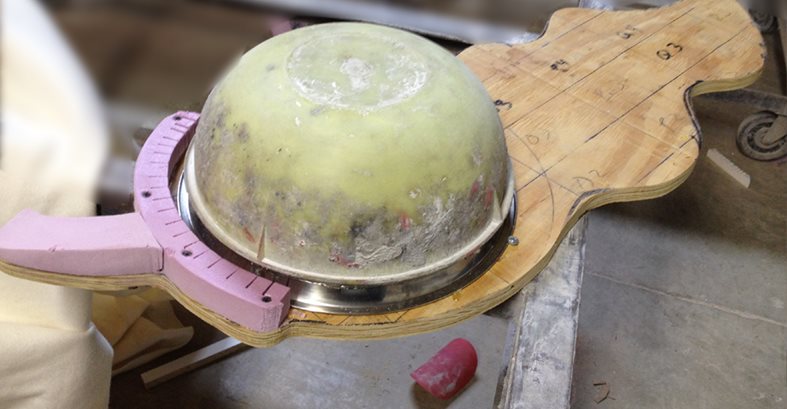
The next step was to figure out the elevations of the mold. “We found a couple of bowls for creating the right dimension and taper for the bowl,” says Dave. This would allow the basic elevations to take shape and to begin the 3D contours of the sink.
-
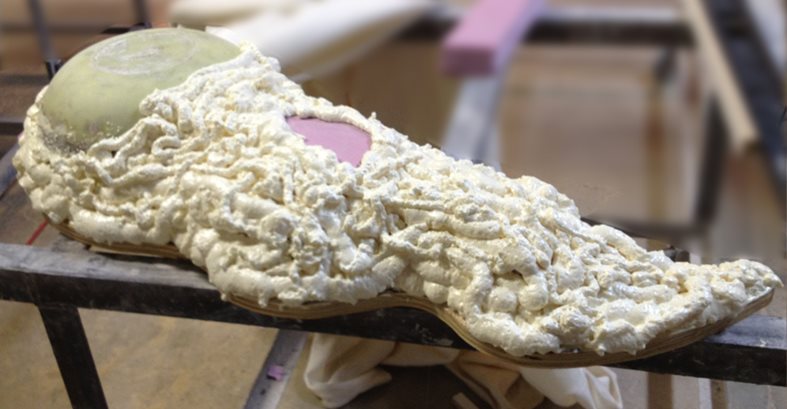
“We had to create the contours and shape all by hand. We had the idea to use expanding foam. So for the first time, we created elevations with that and it worked great,” recalls Dave.
-
Loading the shape up with expanding foam, Dave next took a turkey carver and carved the sink bowl shape like a sculpture. “We carved it and then sanded it perfectly smooth,” he says.
-
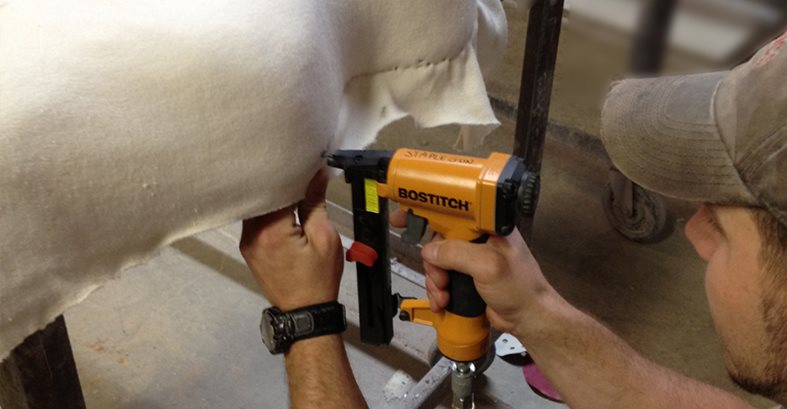
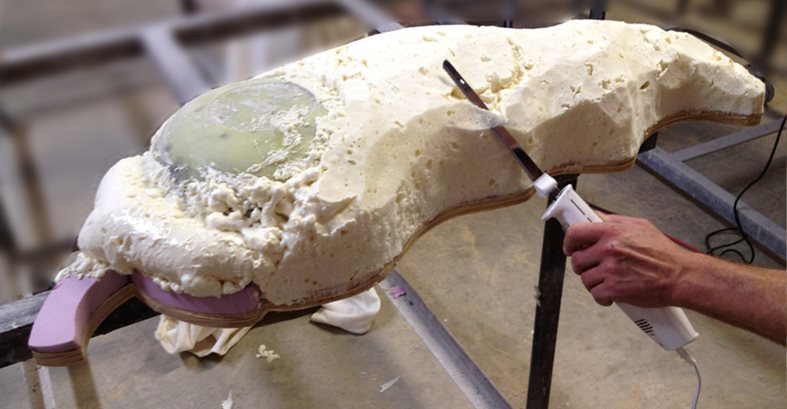
In addition to Dave’s creative use of a turkey carver, he also applied untraditional methods to traditional fabric forming. “We pulled fabric and stretched and stapled it over the carving. This allowed us to make the mold completely smooth, and it takes out the little imperfections and gives a skin to work with,” he explains.
-
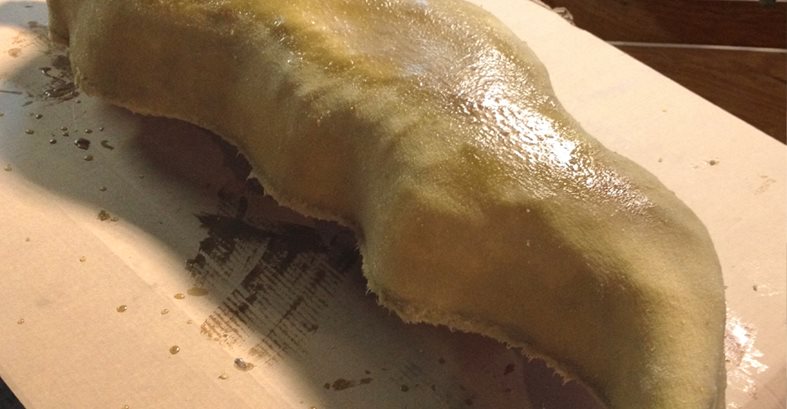
The mold was then coated with fiberglass resin which created a hard shell. The mold was cut off from the wood backboard, and then Dave says, “we pulled out the guts and now it’s a hard shell fiberglass casting of the pepper.”
-
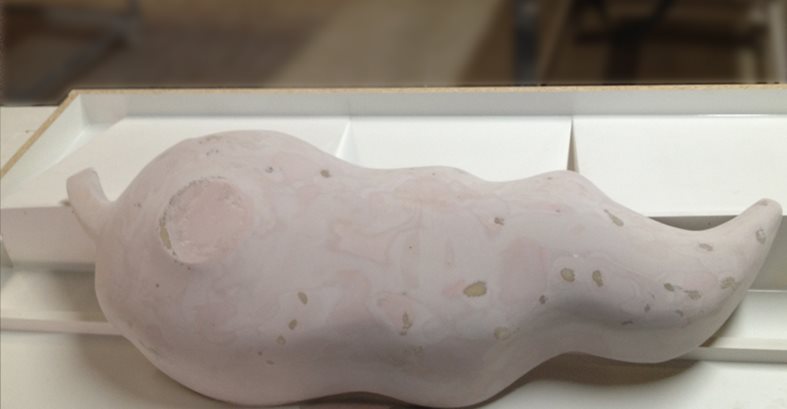
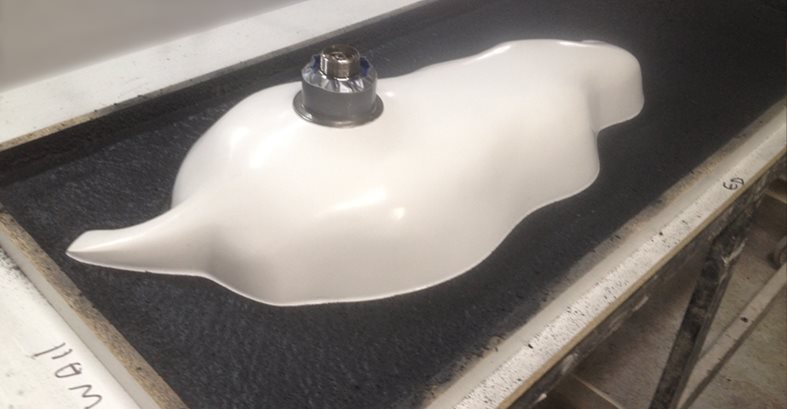
Sanding and filling with Bondo created a perfectly smooth and clean surface for the gel coat to sit on.
-
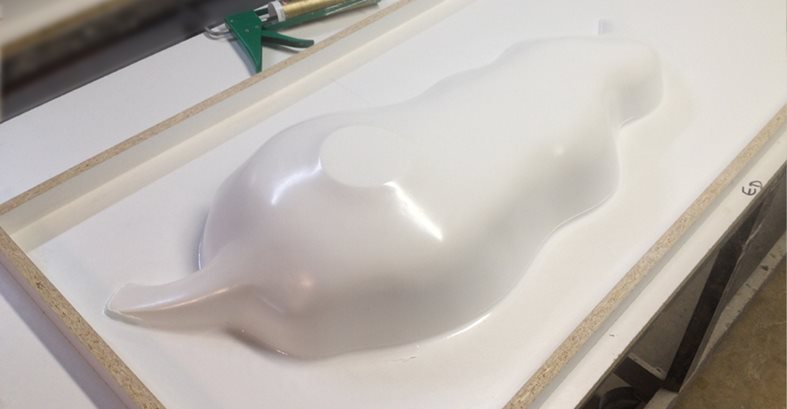
The sink mold was then placed and caulked into the countertop form. “It was caulked onto a standard 1.5” eased edge cast on melamine,” explains Dave. “We caulked into the mold with a wide bead around it. We wanted a really smooth transition where the mold and the project form met up.”
-
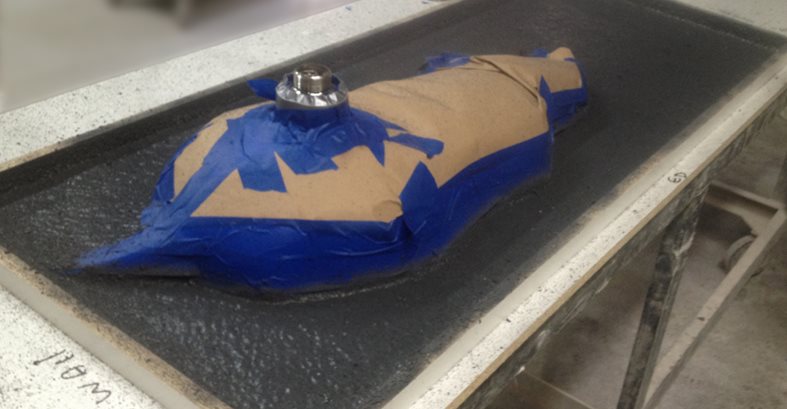
Once the mold was set, the drain hole was created. “We beefed up a drain and made it thicker than a standard drain. We packed it with tape and it gave us more room for the drain to sit comfortably,” says Dave. The mold was then covered with paper and the first face coat of GFRC was sprayed. “We use a proprietary GFRC blend made from local resources. This was shot down in a custom gray color made with integral iron oxide pigments,” says Dave.
-
Once the face coat was down, they carefully peeled the layers of tape revealing a perfectly clean line around the mold. “We consider this line like a racing stripe,” explains Dave. “It has to be really clean.”
-
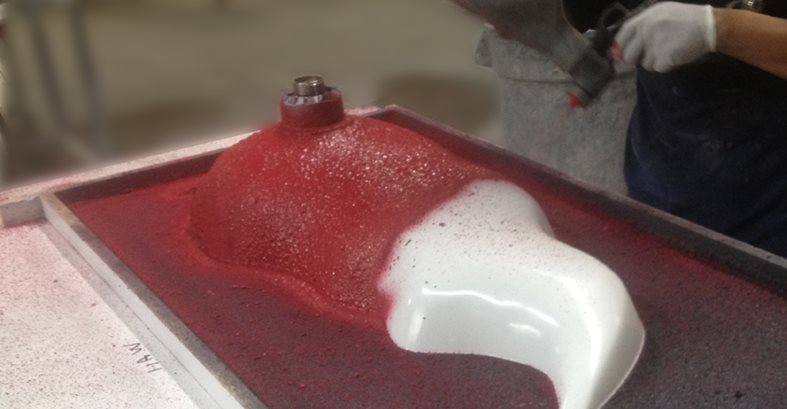
The red GFRC was sprayed down next. And then they created the bonding surface for the back coat to the face coat of the GFRC. “We build the back mix by hand, using gray on gray and red on red,” explains Dave.
-
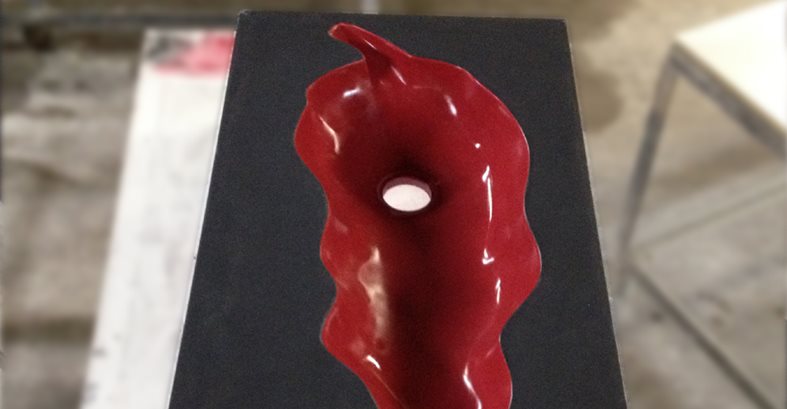
Once complete, the mold was taken out revealing a remarkably smooth, vibrant red sink basin. This image shows the final sink and counter surface after being wetted down with water. “The next step is to seal it,” says Dave. “We use a topical sealer that will tolerate a highly acidic and corrosive work area.”
 Slot Drain Ramp Sink Mold
72" with internal reinforcement
Slot Drain Ramp Sink Mold
72" with internal reinforcement
 Rectangle Sink Mold
Internally reinforced. Ships in 2 to 3 business days.
Rectangle Sink Mold
Internally reinforced. Ships in 2 to 3 business days.
 Mold Making Kit
Create custom rubber molds for concrete casting
Mold Making Kit
Create custom rubber molds for concrete casting

