- Concrete Stain Home
- Get the Look - Stained Floor Pictures
- Color Chart: Concrete stain colors
- Comparison Chart: Compare acid stains, water-based stains and dyes
- Stain Buying Tips: Questions to ask before you buy
- How to Stain Concrete
- Types of Stains and Coloring Options
- Acid-Based Stains
- Water-Based Penetrating Stains
- Concrete Dyes
- Concrete Paint
- Exterior Concrete Stain: Click through images of outdoor stained concrete projects
- Stains and Equipment Product Reviews
- Troubleshooting Concrete Stains
- Common Staining Issues: Tips from expert Chris Sullivan
- Removing Stains from Concrete
Acid Staining Basics
- Question:
-
I install a lot of driveways and patios, and some of my new customers are asking for stained concrete. I've never tried applying acid stains. What are the basic steps, and how can I avoid problems?

After applying an acid stain, it's necessary to scrub the concrete with analkaline soap to neutralize the concrete and remove any unreacted stain and stain residue.
- Answer:
-
I get questions like this one almost every week, and not just from first-time stain applicators. When applying acid stain, understanding the basics are vital to achieving good results. Let's review the four basic steps to staining and the proper procedures for each. Following these steps can eliminate most problems when staining concrete.
- Surface preparation. Understanding what the concrete is going to do once the stain is applied is very important. Proper surface preparation can save you a lot of headaches down the road. A simple water test (spraying water over the surface and observing what happens) is always recommended and tells quite a bit about the porosity of the concrete and the ability for the stain to wet out and react. Look for dry spots or beading of the water. If the water does not soak in evenly, additional prep may be necessary. Dry sanding, chemical degreasers, and mineral acid cleaning are three common methods of cleaning or opening up the surface for better penetration. Conducting a moisture-vapor emission test is also a good idea at this time. This will measure how much moisture vapor is being emitted from the slab. Too much moisture could inhibit stain penetration. You can read more about this topic on The Concrete Network (www.concretenetwork.com/bob_cain/)
- Stain application. Applying the stain is actually the easiest of the four steps. Most stains provide a coverage rate of 250 to 300 square feet per gallon. Avoid overapplication, which can create surface tension or buildup, especially on less-porous concrete surfaces and when using darker stain colors. I recommend applying the stain using a broom or walk-behind scrubber to promote better penetration and reaction. Make sure the stain "self heals" after scrubbing, which means the brush or broom marks close up and the stain becomes one fluid layer. Allow a minimum of 5 hours of dwell time, and repeat the procedure a second time if a darker color is desired.
- Neutralizing and Washing. This is the most misunderstood and overlooked step of the four. To better understand the importance of neutralizing, think of it this way: By applying an acid stain, you take concrete from a basic pH state to an acid state. You need to return the concrete to a basic state, while removing any unreacted stain and stain residue. Simply put, this step involves a good old-fashioned cleaning and scrubbing with an alkaline soap that can break down stain residue and neutralize the surface. Using water by itself is not enough. Once again, use a broom or walk-behind scrubber. Typically, multiple scrubbings are needed, especially with terracotta and dark brown stains. Take a pH test to make sure the surface has been properly neutralized. Then rinse the surface with clean water and allow ample dry time before sealing.
- Sealing and Maintenance. The final step is to apply a sealer to the stained floor to keep it looking and performing its best. However, sealing by itself is not enough. It's important to use a sealer system, which includes a base-coat sealer and a sacrificial topcoat sealer, or wax. (See the Sullivan's Corner post on removing black heel marks.) Even when you follow all the steps outlined above, variations can occur. That's why you should apply a sample of the stain for all your staining projects. This is the only way to get a good idea of what the stain will look like. For more detailed staining guidelines, consult with the stain manufacturer. Also, visit ConcreteNetwork.com for articles and reference guides on staining and troubleshooting stain problems.
Learn more about how to buy concrete stains.
Return to How to Fix Concrete Acid Stains
Shop for Concrete Stains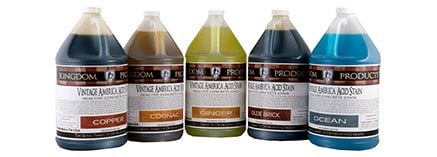 Vintage America Acid Stain
Organic, antique patina, deep penetrating reactive stain.
Vintage America Acid Stain
Organic, antique patina, deep penetrating reactive stain.
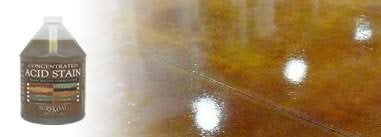 Acid Stain by Surfkoat
Makes up to 2 gallons. Great for marble look.
Acid Stain by Surfkoat
Makes up to 2 gallons. Great for marble look.
 Stain-Crete by Increte
9 standard colors. Useful for old or new concrete.
Stain-Crete by Increte
9 standard colors. Useful for old or new concrete.
 Elements® Transparent Concrete Stain
Water-based, environmentally and user-friendly
Elements® Transparent Concrete Stain
Water-based, environmentally and user-friendly
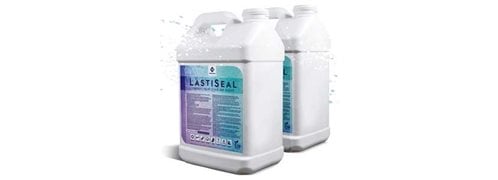 Concrete Stain + Sealer in One
Waterproof, strengthen, preserve and beautify in one step
Concrete Stain + Sealer in One
Waterproof, strengthen, preserve and beautify in one step
 Concrete Acid Stain
BRICKFORM Blush-Tone Acid Stain available in 10 standard colors
Concrete Acid Stain
BRICKFORM Blush-Tone Acid Stain available in 10 standard colors
 In-Fluence Water-Based Stain
24 non-reactive colors that transform concrete.
In-Fluence Water-Based Stain
24 non-reactive colors that transform concrete.
- Surface preparation. Understanding what the concrete is going to do once the stain is applied is very important. Proper surface preparation can save you a lot of headaches down the road. A simple water test (spraying water over the surface and observing what happens) is always recommended and tells quite a bit about the porosity of the concrete and the ability for the stain to wet out and react. Look for dry spots or beading of the water. If the water does not soak in evenly, additional prep may be necessary. Dry sanding, chemical degreasers, and mineral acid cleaning are three common methods of cleaning or opening up the surface for better penetration. Conducting a moisture-vapor emission test is also a good idea at this time. This will measure how much moisture vapor is being emitted from the slab. Too much moisture could inhibit stain penetration. You can read more about this topic on The Concrete Network (www.concretenetwork.com/bob_cain/)

