- Concrete Homes Home
- Concrete Homes Pictures
- Do Concrete Homes Cost More?
- Optimizing the Energy Efficiency of an ICF Home
- Design Ideas for Concrete Homes
- Related Information
- Hurricane-Proof Homes
- Building Concrete Safe Rooms
- Going Green with Concrete: An Overview of Concrete's Eco-Friendly Benefits
- Tilt-Up Concrete Construction
- Building a Concrete Basement
- Other Resources
- Concrete Home Infographic
- Free Brochures
- Concrete Contractors: Find Concrete Form Products and Suppliers
Section Sponsor

Concrete Homes
Designing Concrete Walls
Designing Concrete Walls for Homes
Time: 04:29
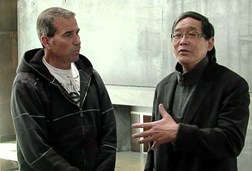
Fu-Tung Cheng:It was fortuitous that Chuck Hunt of Carlson Construction came by while we were doing our shoot here, and I just love the opportunity to share some of the war stories we've had working on this project because this was a first for Carlson to do a construction like this. And, you know, I won't admit it, but it's a first for me, too. And the idea here in doing the walls was to build it in lifts, and these are 12-inch-thick walls, 8 inches of which is an engineered wall and the other remaining 4 inches was meant to be the outside decorative wall, and in between was some insulation.
So it was a very difficult formation of clasping together in the form the insulation and the decorative aspects, when you see all the streaking that I did in it and everything. But Chuck here was really on the frontlines trying to manage all the formwork and how to save the forms because we were using one set of forms throughout the whole project. They were very expensive. They were lined with Formica.
Chuck Hunt:Glossy Formica.
Fu-Tung Cheng:Glossy Formica, and they had this neoprene edge. You'll see that neoprene reveal around the whole house. Each one of those was this neoprene, very hard neoprene that was put on the form. And so we spent a lot of money creating those and we wanted to have one set that we kept using lift after lift. So, Chuck, how did that work?
Chuck Hunt:It actually worked pretty well but by the time we got -
Fu-Tung Cheng:He said "pretty well," you noticed.
Chuck Hunt:By the time we got to the end of all of the pours, we just had to succumb and get more forms. We just had to make more forms, and it was just the way it was because you had to cut. You had to start off with an 8-foot piece and then you ended up with a 4-foot piece, so you had to cut one when you go to the end of the wall.
Fu-Tung Cheng:You mean you didn't just piece together all the little two-inch pieces left?
Chuck Hunt:No. We can't do that -
Fu-Tung Cheng:Oh, I see. Okay.
Chuck Hunt:- because we had to have certain lines on the wall. It was all laid out beautifully on a piece of paper for us for each elevation and we had to number them and figure out which ones we could use where and which ones to cut, which ones not to cut, and where to place all of our screws and everything.
Fu-Tung Cheng:And when we attached these, we didn't use standard form ties, which was another thing that he had to deal with. As you notice in these walls, there are little copper caps inside each one of the form tie holes because we use threaded rod instead of using the standard form ties through the forms to capture the forces of the concrete trying to expand out. So, with our custom threaded form ties, each one left a little hole and we embedded little pieces of copper. And then there was some confusion on which way to put the copper.
Chuck Hunt:Yeah. I thought they should go with the cap side facing out and you wanted them to go the opposite way, almost like the number on the house. We couldn't figure out it if was House 6 or House 9 so …
Fu-Tung Cheng:Right. Well, we finally got it all right and those little details that are functional details actually add a little element of surprise to what ordinarily would be a wall full of the regular form tie holes, the conical shaped holes. Now little copper inlays add a little hint of a detail that you wouldn't normally get in a house. From countertops to floors, fireplaces, walls, you can see that anything is possible with concrete. You can start small and dream big.


