Custom DesignCrete Inc. Turns Dilapidated Brick Fireplace into Stunning (Faux) Stone
Creating custom stamped projects is all in a day's work for Domenic Mattei, owner of Custom DesignCrete Inc. in Pittsburgh, Penn. In fact, it's that unique creative approach, coupled with his focus on quality, which has proven so successful time and time again.
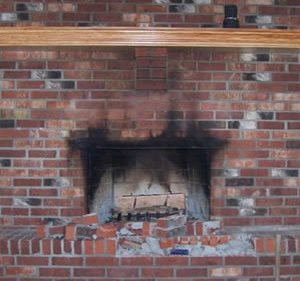
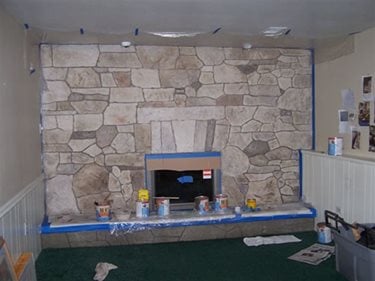
 Before
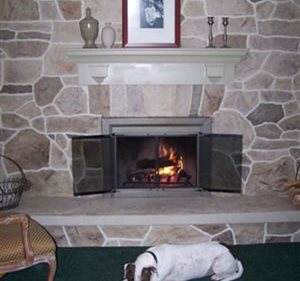
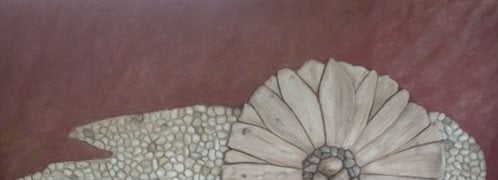
After
Before
After
Recently, Mattei took a beat up, broken brick fireplace and wall, crafting in its place a faux stone wall and fireplace, as well as a custom mantel, which looks and feels just like the real thing, but without all the maintenance.
With over 26 years of concrete experience to his name, Mattei started his company in 2000, which serves the Ohio and West Virginia areas, in addition to Pennsylvania. His portfolio consists of 90 percent residential and 10 percent commercial work, with about 99 percent of the work in exterior and one percent interior, including countertops, curbs, driveways, interior floors, patios, pool decks, stairs and walkways in a variety of finishes, such as colored, dyed, exposed aggregate, custom, sandblast etching, and texture and vertical stamping.
Here's what he had to say about the fireplace project:
Q. How did this project come about?
A: This was done for a local homeowner who contacted us through our website. They were undergoing a complete downstairs renovation, and they had about 130 square feet of brick wall and fireplace in disrepair. They did not know they wanted concrete, and after I talked with them I suggested a vertical system, because I prefer its ease of use, as well as the realistic textures it produces.
Q. How did the design process work?
A. Well, we didn't stick with the traditional system. After we had gone over many design options, we created a custom, hand carved stone. This was our first custom piece. Generally we only offer patterns from the manufacturer.
Q. What did you have to do first?
A. First we performed all of the demolition by removing the existing brick hearth. Then we cleaned the brick and removed all the soot and debris.
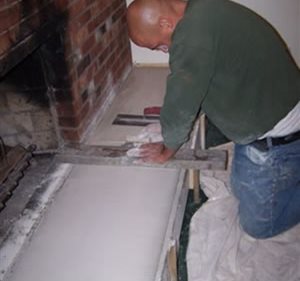
We then went on to prepare the formwork for the new cast-in-place hearth that was to be installed.
We poured the hearth first, using a bag mix as well as our own concoction. We used less than ¼ of a yard of Sac Crete, and I added my own special blend for strength. The hearth was reinforced with rods and mesh. We used buckets and poured the concrete in forms. After the concrete had been placed, we broadcast the color hardener over the top, using Brickform's Adobe Buff.
Next, we were ready to imprint the texture. During the design process the owner's expressed that they wanted something truly unique, and we thought that we could incorporate leaves and branches into the stamped pattern as well. We achieved this by first placing actual leaves and branches onto the concrete just prior to placing the seamless texture mats. We've never incorporated any natural elements such as leaves into our work before, but after the way this project turned out, we definitely will be doing more of this in the future.
After the stamping operations were complete, we came back the next day and protected the hearth and walls with plastic, then got to work on the large wall that was to be vertically stamped.
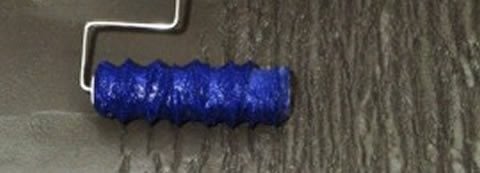
Q. Tell me about the vertical stamping process.
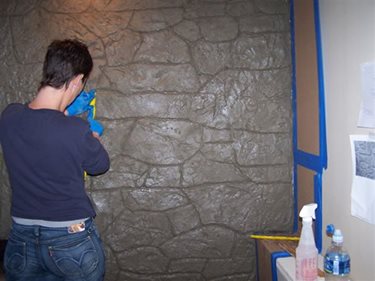
A. We use FossilCrete, which is easy for me to obtain. I did the wall in sections, by applying the product according to the instructions, then my wife followed and did hand carving and gave the rocks their texture with our own tools.
Here is where I have to give all the credit to my wife, as she did all of the carving and actual texturing of the stone work. That part took about six to eight hours, and we used about 12 to 14 bags of product. It's one inch thick or more in some places, but we also had it protrude out in areas to simulate stones jutting out of the wall and give it a more realistic feel.
Q. What was the coloring process like?
A. After we let the wall sit overnight, we came back and used a proprietary blend of colors in four varying shades. The coloring was all done by hand and took about two full days. We used an acrylic stain manufactured by H & C.
We had done a mock up of the color prior to the installation, so it was similar to paint by numbers.
Q. What were the final steps to the finished product?
A. After the wall was colored, we installed grout into all of the mortar joints using regular tile grout applied with a mortar batter bag.
Then, we put a final sealer coat on, using a water-based penetrating sealer called Enviroseal 40.
Q. Final thoughts about this project?
A. In all, it took about five days. When we finished, the clients said it exceeded all of their expectations, and they were thrilled. We always enjoy installing vertical projects, because the system offers us a chance to be creative in a whole new way with each installation.
Custom DesignCrete, Inc.
Domenic Mattei
PMB 1
Crescent, PA 15046-0001
Serving Pittsburgh and surrounding counties
(888) 268-1196 Toll Free
(724) 457-4110 Fax
Send Mail Now - Click Here
www.padesigncrete.com
Read More About Vertical Stamped Concrete
Return to Vertical Concrete Projects
 Vertical Overlay Texture Tools
by Butterfield Color
Vertical Overlay Texture Tools
by Butterfield Color
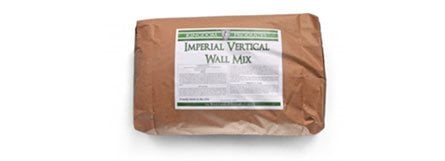 Vertical Wall Mix
40 lb Bag
Vertical Wall Mix
40 lb Bag
 Brickform Vertical Mix
Great for Carving or Stamping
Brickform Vertical Mix
Great for Carving or Stamping
 Butterfield Cantera Wall Mix
Just Add Water
Butterfield Cantera Wall Mix
Just Add Water

