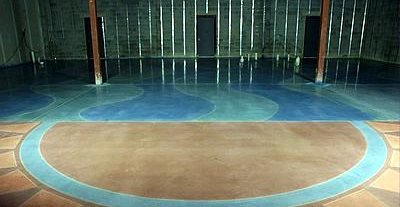
Polished floor by Cuviello Concrete and Terrazzo Polishing.
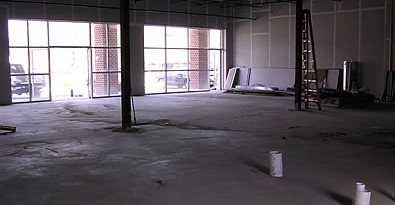
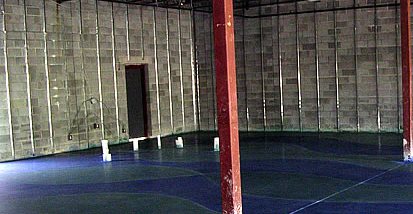
Tanning salon floor prior to staining and polishing.

Another before image.
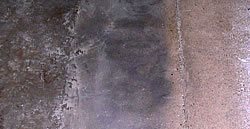
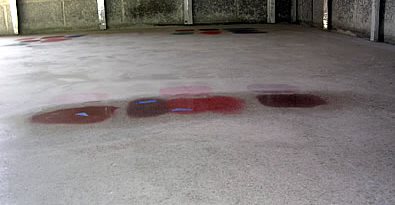
Close-up of floor surface and the various layers in the cream.

The back of the floor was ground to 220 metals and the front to 100 resins. The floor is still damp in some areas in the front from auto scrubbing.
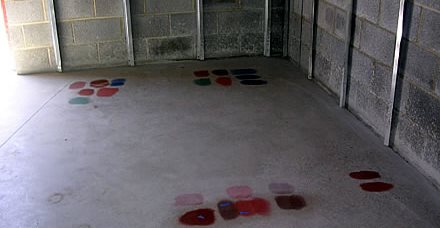
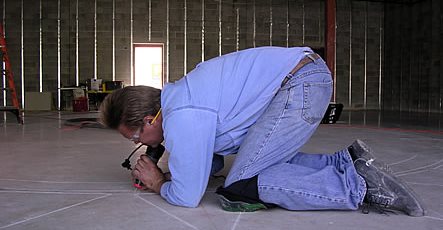
Color samples of the stain were applied and polished with a hand grinder to get the customers approval.
Polished stain samples.

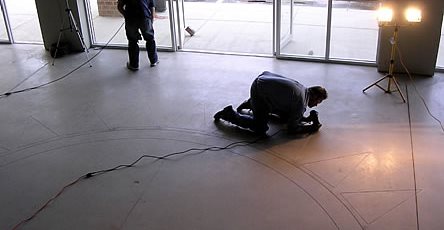
The Mongoose 411 from Engrave-A-Crete was used to cut all the lines of the floor designs.
Once all the sawcuts were cut, a RotoZip router/saw was used to finish off all corners so that the lines connected clean.
Another process photo.
Stained but not yet honed and polished.
Stained but not yet honed and polished.
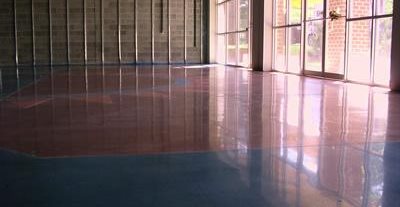
Finished at 800 grit.
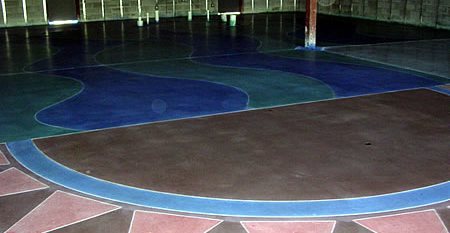
Finished at 1500 grit.
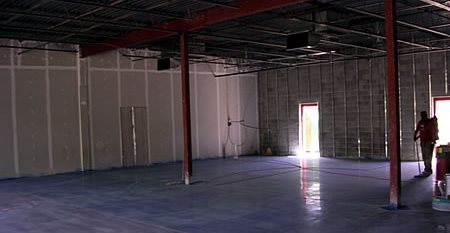
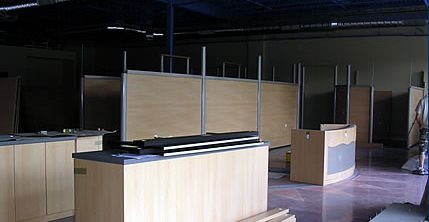
Walls during assembly unfortunately with all the construction they are very dirty.
Walls during assembly unfortunately with all the construction they are very dirty.
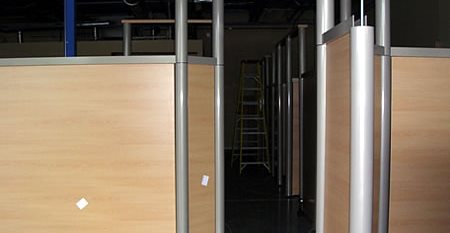
Walls during assembly unfortunately with all the construction they are very dirty.
Jim Cuviello of Complete Decorative Concrete Solutions (CDCS) in Annapolis, MD, sent in this informational account of a stained and polished commercial concrete floor project. Read on to find out the step-by-step procedures followed including tips and information on grinding, honing, polishing, staining, equipment used, and more. The Complete Decorative Concrete Solutions team consisting of Pete Cosgrove of CDCS, James Stephens of Heavenly Touch Stone Care of San Jose, CA and Giovanni Lagana of Lagana Tile in Monterey, CA, who flew to Annapolis to lend a hand in the polishing process and hone their skills in concrete staining techniques.
The Lavina 25, 7.5HP, machine and diamond abrasives came from Mile at Advanced Diamond Tools in Canada. To collect the concrete dust the Pulse-Bac system from CDC Larue was used. All the saw cuts were done with the Mongoose 411 from Engrave-a-Crete. The Polishable Concrete Densifing Stains are from Seal Source International.
The job is a 3,600 square foot tanning salon with six, 600-square-foot sections that are stained orange, brown, green, a blue/green combination and two shades of blue. There are sawcuts throughout the 3,600 square feet. When the floor is completed, walls for 22 tanning rooms, a lobby, office, laundry room, and bathroom will be installed.
Managing the customers expectation through the project is as important as the work itself. It is important to keep the customer involved throughout the process so they can see the progress and build an idea throughout the project what the end result will look like. This way there are no surprises because the customer had preconceived ideas of what the end result was going to be.
Before starting any job try and find out the specifics of the concrete mix that was used for the slab. This will not dictate the overall procedures but will help decide the best course of action. Often this information is not available and you are left to trial and error. This particular concrete slab was a fiber reinforced concrete that appeared to be soft.
Since this slab was going to be stained the goal is to expose as little aggregate as possible and reach the most refined cream within the surface. This will allow for the best stain saturation and true color of the stain.
It is the precision of your initial grinding that largely sets the stage for the quality of the completed job.
In a commercial setting, there are typically two or three different layers of concrete within the surface cream before exposing aggregate -inch or larger. The surface cream on this slab had three layers. The top was a burned hard troweled surface with fibers sticking out like fur. The next layer was a refinement of the hard troweled surface. The last layer is lighter, even in color, and consists of very small aggregate/sand the size of a pin head and a little bit larger, about 1/16 to 1/8-inch. This last layer is the purest. It is the most consistent in color and has the most imperfections removed before exposing aggregate and larger.
Different from restoring and polishing marble/granite floors, these layers are a key element when polishing concrete when exposed aggregate is not desired. When restoring and polishing marble/granite there are no distinct layers, per se. There are variations that go through the whole stone not just in the surface. With concrete, if expose aggregate is not desired and the goal is to work within one of the layers, you have to be careful not to grind through that layer. The goal is to refine to and remain within the desired layer and make it as consistent as possible throughout. These layers can vary in thickness through the surface of the slab.
Finding the right diamond combination on the first day sets the pace for the rest of the job. Diamond combination is not just referring to sequence of grits but the actual style of diamonds - ones with more and less surface area. It provides a base to work off with the ability to change as needed. Once the surface is ground off there is no putting it back. For the most part, once a good set up is found it can be carried through the whole job. Although, be prepared to possibly get thrown for a loop and find an area that the predetermined set up does not work. This is when you go to your tackle box of abrasives and slowly figure out what is needed to finish that area. Always watch the results while working specifically in the initial grinding steps.
It is our preference to start and finish dry. If possible we prefer not to deal with wet concrete slurry. We started by grinding dry with 220 grit, Metal Super Thick Abrasives from Mile at Advanced Diamond Tools. When trying to cut the slab the 220 grit abrasives would leave various light scratch patterns but not actually cut. The concrete seemed like warm plastic. The heat from grinding dry had partly to do with this although the diamond tooling never glazed. After attempting other diamond sets dry (ones with more and less surface area and different grits), it was determined we had to go wet for our initial grinding steps.
Once again we started with 220 grit Metal Super Thick Abrasives (wet) and found it was removing the burned troweled surface but very slow. Keep in mind we did not want to go to aggressive, we wanted to find that sweet cream that would allow the stain to saturate to its fullest potential. In addition we wanted to eliminate as much crazing/webbing/micro-cracking as possible.
Our passes consisted of up/back and up/back over the same area. Sometimes depending on the levelness of the concrete, we would go over the area a total of four times but at different angles. It is better to take extra passes removing a little surface at a time then go with a more aggressive diamond taking less passes only to find out you took too much off.
Just a note, there is no reason you can not stain a slab with exposed aggregate when using the Seal Source International water-based Densifing Stains. Most aggregate will not absorb the stain or will do so very little. A stained aggregate floor can be very decorative.
Since the 220 grit metal took a lot of time we went to the 120 grit Cementina Metal Bond Diamonds from Mile at Advanced Diamond Tools. Again this went a little slower than we wanted so we went to the 70 grit Cementina Metal Bond Diamond. This gave us great production without exposing aggregate. The fibers sticking out were not a concern because they almost always get burned off the surface during honing and polishing. The first four 600 square foot sections of grinding consisted of 70 grit Cementina Metal Bond Diamond then the120 grit Cementina Metal Bond Diamonds and finished with the 220 grit Metal Super Thick Abrasives. All three of these grits were done wet.
When starting the fifth section we took one pass with the 70 grit Cementina Metal Bond Diamonds and went straight through the burnt surface, the sweet cream, and a good bit into the aggregate. In simple terms this section was very soft and cut much easier. On the technical side the metal matrix of the pad responded in a manner that allowed the diamond abrasives to cut quicker. This will be left for another day. Usually, you have clues such as color variation to the hardness of the concrete. Unfortunately, there were no clues. We immediately stopped; put on the 220 grit Metal Super Thick Abrasives and made our up/back, up/back passes wet. We found the 220s cut consistently but not very quick. We then tried 120 grit Cementina Metal Bond Diamonds and the 120s cut great but found up/back, up/back took too much surface off. I said earlier, it is better to take more passes and time then to take off too much surface at one time. The 220s would have worked but would have taken way too long and the 120s were too aggressive to take a little off going up/back, up/back. We looked in our tackle box of abrasives and did not have anything that would allow us to cut slowly using our up/back, up/back method. One of the reasons for using this up/back, up/back method is that it allows for further refinement of the surface on a microscopic level than if you were to go with a more aggressive grit passing over the surface quicker with less passes. The result of a more refined surface as you work through the grits is a surface that when done gives you better depth and clarity of reflection. It will also give you a better chance of having depth and clarity of reflection looking straight down on the floor than having to look across the floor into the distance. Since we did not have any abrasives on hand (Our answer was probably the 220 grit Cementina Metal Bond Diamonds but we did not have them on hand.) we had no choice but to use the 120s and make two one-way quick passes in different directions to make sure we hit all the little dips. We then moved up to the 220s and continued with our up/back, up/back method. In some areas we took another up/back pass to get the most refinement possible.
Always be ready to switch up your procedure when needed and always pay attention to the details as you go. We stayed with this current set up going into the sixth section and as it turned out this section was the same as the fifth. For the last two sections the combination we used was 120 grit Cementina Metal Bond Diamonds making two one-way quick passes in different directions then the 220 grit Metal Super Thick Abrasives going up/back, up/back wet. In some areas we went up/back one more time with the 220s to allow for further refinement of the surface.
Once all 3,600 square feet was ground to 220 metals, we thoroughly dried it and went to 100 grit phenolic resins dry also from Diamond Tools in Canada.
You have to think of a jobsite as a puzzle. There are a lot of steps involved in bringing a project from start to finish. There is running the equipment, cleaning the floor, laying out the design if there is one, getting the customers approval, sawcutting, if needed stain samples, etc. When one step is being completed by one person, such as grinding, then someone else can be completing the next step such as cleaning that same area. And at the same time, more people can be at the other end of the slab, completing more steps that may be completely independent of what is currently going on, such as design work or stain samples. In addition, everyone should be thinking ahead. For example, when it is ready to change the diamond abrasives, someone is standing there waiting for the machine to be lifted to make the change. The jobsite needs to run like a well-oiled machine so that production is at its maximum.
As each section was being finished with 100 grit phenolic resins they were also being cleaned with an auto scrubber. It was being determined where the walls were going to go and samples of the stain were being applied and polished with a hand grinder to get the customers approval.
Keeping in mind that the customer was approving the general color, not the exact color, because the stains true colors will vary throughout the slab according to its porosity. What also partly determines the porosity is the grit you stop at before staining, what layer of the concrete the stain is applied to, and the variation at which the diamonds hit or did not hit in the low and high spots. If need these low spots can be refined with hand tools. In addition, the concrete will dictate how the stain is absorbed as a result of the mix, how it dried, finishing methods, etc.
Now that it had been determined were the walls would go, it was time to layout the rest of the floor for sawcuts. Next the half circles and sun rays were laid out. The center point of the lobby was found and the half circles were drawn with a picture frame wire stretched out with caulk taped to the end. Picture frame wire was used because it does not stretch and is flexible. Once the floor was laid out, the Mongoose 411 saw from Engrave-a-Crete was used to cut all the lines. All of the lines were cut free hand!
In the past we used a grinder with a 4 blade and metal straight edge to finish off the lines. This job had some small detail work in the rays that need attention that a RotoZip took care of. The RotoZip can also be used with a small circular blade. It is much easier to use then the hand grinder. This tool allowed us to tighten up on all the sawcuts throughout the entire floor, much more so than using the hand grinder.
Details, Details, Details make the difference between a good job and an exceptional job!
Now that all the cuts were complete and the floor was as clean as possible it was time to start staining. The stains we used are Densifing Concrete Stains from Seal Source International that are water-based. There are no hazardous acids or solvents to deal with, and the application cannot be any easier. There is no need to wear extensive protective clothing or face masks.
The stains are unique in that the carrier of the pigments is a concrete densifier so the concrete gets densified and colored at the same time.Concrete densifier helps polished concrete retain its shine because it makes the surface more abrasion resistant among other properties. The stain is quick and easy to apply cutting out several steps that other polishable concrete stains have to go through to obtain the end result.
Simply, apply the stain to the desired color shade after 100 grit honing with phenolic resins. Apply a touch more stain in anticipation of a little color lifting out during honing.
Once the stain was dried we moved on to 200 grit phenolic resins. If you have never stained and polished a floor before it can be a bit nerve racking to watch the floor turn almost white as the 200 grit phenolic resins move across. At 400 grit phenolic resins some of the color came back.
At 800 the floor popped and more color came back.
At 1500 we had great clarity, the floor looked tight and the color came back.
Cuviello Concrete and Terrazzo Polishing
Jim Cuviello
224A Log Canoe Circle
Stevensville MD 21666
Send Mail Now - Click Here
www.cuvielloconcrete.com
Learn more about retail floors