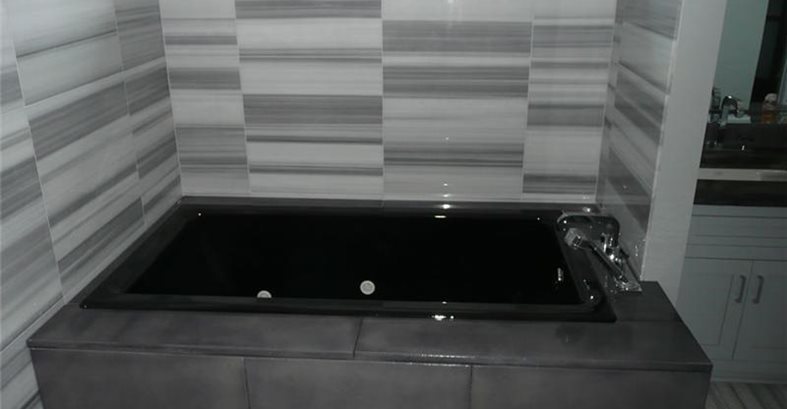
A close-up of the bathtub surround in the master bathroom. This piece was precast in our shop.
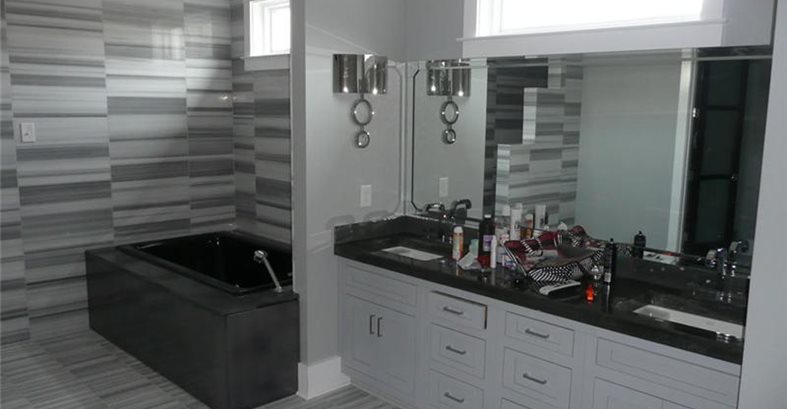
The master bath also has a charcoal-colored cast-in-place concrete vanity that matches the tub surround.
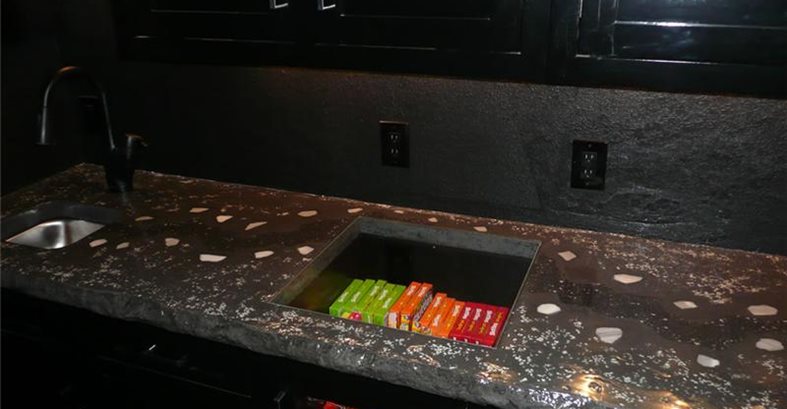
The concrete counter in the theater room is one of my favorites. It features an engraved river to match the floor overlay, a built-in candy display, glow-in-the dark aggregate, and marble mosaics.
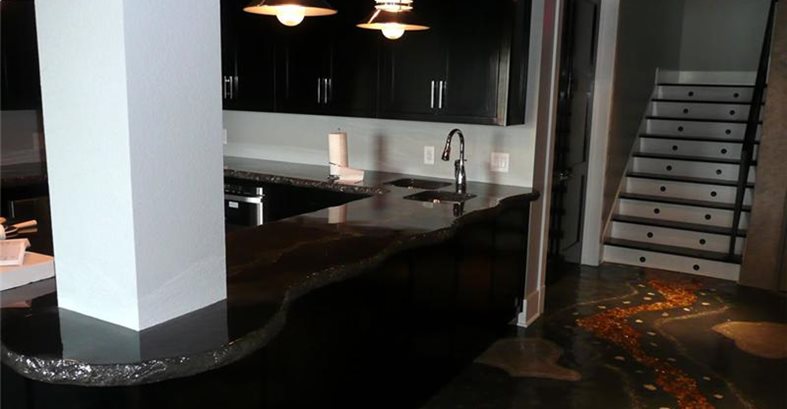
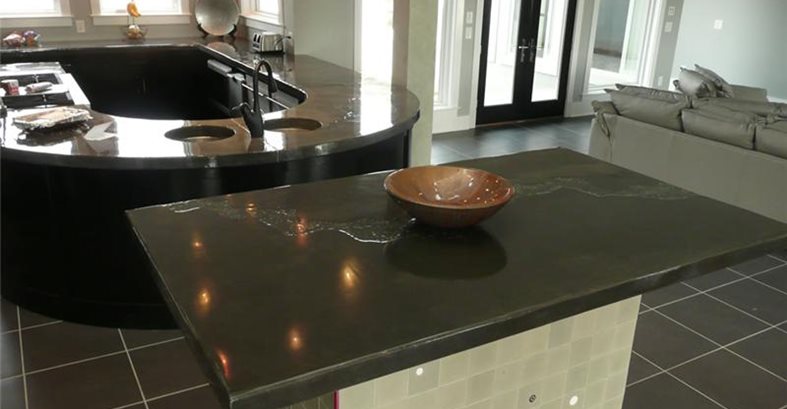
For the downstairs kitchen, we cast the countertop around a column. This counter also has a double undermount sink, a split-face granite edge, and an engraved river to match the floor.
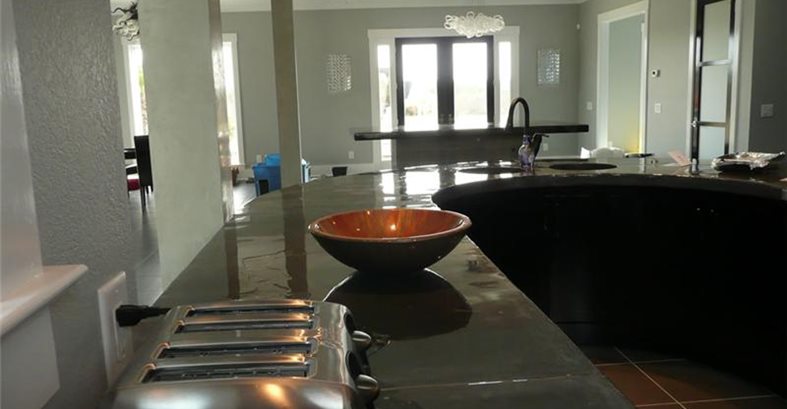
A close-up of the finished surface, with the high-gloss epoxy finish requested by the homeowner.
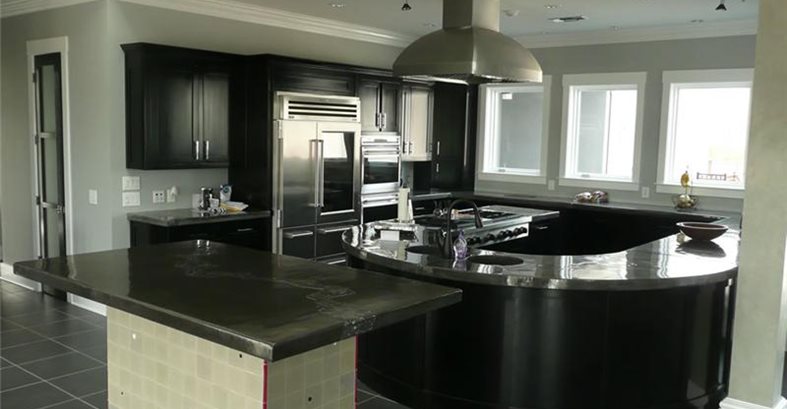
A view of the completed kitchen countertop and island.
At the end of this project, our team felt like we had good reason to celebrate. The countertops look beautiful.
Cast away... and away ... and away. That's what we definitely did at the Higgs residence to build concrete countertops for their two kitchens, three bathrooms, laundry room, and theater room. Overall, the project involved 15 counters totaling approximately 600 square feet.
As mentioned in earlier articles on this project (see Show and Tell and River Runs Wild), it is so cool to get involved with a client that truly appreciates concrete for what it is, and who welcomes all of the unique characteristics not readily found in other building materials. This was the case for Lori Higgs, who chose to use concrete for the countertops throughout her family's home.
One of the main considerations for this project was to decide if the counters would be precast or cast-in-place. Certainly both options have distinct advantages as well as disadvantages, and we use both methods regularly. On a side note, it's interesting to listen to precasters hyping their method while cast-in-place contractors proclaim that precasters don't have the ability to finish concrete. I'll leave that debate to craftspeople with way too much time on their hands. On our project, casting the counters in place seemed to be the logical choice, taking into account their size and shape as well as some of the out-of-true walls they would abut against. The real deciding factor, though, was when Lori visited our showroom and viewed both options. She kept gravitating towards the organic nature the hand-troweled concrete offered. There we had it. It was time to build some cast-in-place counters!
The Cast-A-Thon Begins
We started off with two pours in the laundry room, one being a countertop and the other an island totaling 80 square feet of charcoal-colored concrete. This was a "ho-hum, no-frills" application, with no sinks or embedments. I suppose this was a warm-up for what would lie ahead of us. As we moved on to the bathrooms, the work became more challenging. For the vanity in the master bathroom, we had to install two sink knockouts. We like to remove the foam knockouts during the pour as opposed to leaving them until the next day and filling in voids or bugholes. Although this tests your finishing ability, it produces a much more seamless look when executed properly. The next two pours (bathroom vanity tops with undermount sink knockouts for the children's bathroom) also came out great. But the main event, the kitchen countertop, was still weeks away because we had to wait for the cabinet guy to install the upstairs kitchen cabinets. In the meantime, we poured a small island top adjacent to where the kitchen counters would be installed. This poor little fella looked out of place for weeks, standing alone atop a wood structure on a sea of tile. But as the photos show, it all made sense later!
Next, we moved downstairs to the basement to start work on some pretty cool counters. While all of this action was taking place, we were also busy back at the shop, precasting bathtub surrounds, a countertop for the mud room, and backsplashes that would be installed in the home later. The first two counters in the basement were small pours consisting of a bathroom vanity and this crazy countertop that protruded out of a vertically stamped wall. But the next two counters were my personal favorites. We started off with a theater room counter, incorporating some very unique features to play off of the concrete floor overlay we had previously installed. Like the floor, we embedded glow-in-the dark aggregate in the concrete along with pieces of hand-chiseled marble mosaics. Another fun feature was a knockout for a candy display, just like at the movies. This was an intricate forming detail, since we had to provide a quarter-inch lip for a sheet of clear acrylic to lie in. Nevertheless, it came out cool and the homeowners especially like it when the lights in the theater go down and they look over to see what appear to be little stars glowing in their counter.
The last counter in the basement was a challenging one, with more than 75 square feet of surface area to be finished. The formwork was unique because we had to form the counter around a column. We doweled into the column with rebar and wrapped the countertop around it. This counter also had a double undermount sink, a split-face granite edge, and to really take it over the top, an engraved river to match the floor.
The Main Event
Finally, it was time for the main event -- the upstairs kitchen, the equivalent of the Super Bowl of cast-in-place countertop work. For this huge pour, involving more than 100 square feet, we contracted the services of our friend Cody Dawkins of Create-A-Crete for his finishing skills. We stripped and finished all of the perimeter edges as well as knockouts for two custom circular sinks. Much of the counter was horseshoe-shaped, which made forming and finishing especially challenging. Also, because of the size, there was a potential for cracking at reentry points. So we installed stainless steel inlays as well as some stainless steel trivets. We secured these down with screws to the subbase and then protected them by masking prior to pouring the concrete. We also had some standard finishing tools custom fabricated to make it easier to finish in between the trivet slats. These were nothing more than standard margin trowels cut narrower and with a radius.
For these counters, we used the enCOUNTER bagged mix, which enabled us to get the rich, creamy concrete mixture needed to facilitate stripping and finishing of all the vertical surfaces. To keep with the theme of the other counters in the house, we also added an engraved vein. Lori, our client, was adamant about having as high a gloss as possible for these counters, which meant using a high-build epoxy. This was a huge challenge to apply because of the airborne dust particulates floating around from the work of other trades.
Touchdown!
At the end of this project, our team felt like we had won the big game, and there was reason for celebration. Looking at the finished environment, with some of Lori's colorful art pieces, I have to say, the counters look beautiful. As a small gesture of our sincere gratitude for the opportunity to work on a project like this, we precast for Lori some concrete bowls and coated them with a metallic finish to match some of her artwork, which she loved. This was a great project to be involved in, and one to be proud of. This project has also spawned additional high-end work for us in the local area. Stay tuned for details about some of the last elements we installed at the Higgs residence, including a huge 'S' shaped counter and wall.