Applying Concrete to a Vertical Surface
Learn the process of applying cement vertically, including preparation and texturing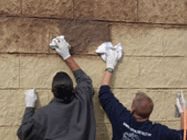
FossilCrete in Pheonix, AZ
The first and most important step when applying vertical overlays is good surface preparation to ensure that the mix bonds to the wall. It's critical to follow the manufacturer's recommendations for the product you are using.
PREPPING WALLS FOR VERTICAL OVERLAYS
First, you'll need to clean the wall surface to remove any dirt or contaminants that could inhibit the bond. On painted or extremely smooth walls, it may also be necessary to lightly sand the surface to provide more grip for the overlay. For exterior wall surfaces such as concrete and masonry, pressure washing and light sandblasting are effective cleaning methods.
After prepping the surface, the next step is to apply a liquid primer or bond coat, using a product compatible with the overlay mix. Priming will keep the wall from absorbing moisture from the freshly applied overlay. After primer application, some manufacturers also recommend applying a thin scratch coat of the vertical mix to improve bonding of subsequent coats. On walls with seams or joints, such as drywall or wood paneling, manufacturers often recommend applying fiberglass-mesh tape over joints and seams to prevent reflective cracking in the overlay and a layer of wire or polypropylene mesh to provide additional reinforcement. For substrates that are damaged, badly cracked or subject to movement, the wall can be reinforced with expanded-metal lath.
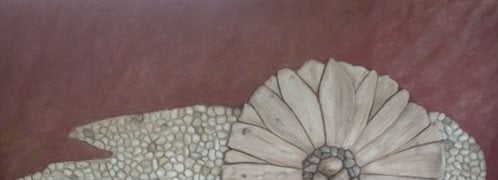
HOW TO TEXTURE CONCRETE WALLS
Vertical concrete surface with added texture that mimics stone work. FLEX-C-MENT in Picayune, MS
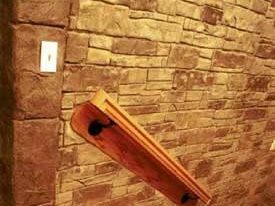
To give vertical overlays pattern, texture and dimension, installers generally rely on three basic techniques: stamping, texturing skins and hand carving. Some artisans will use a combination of these methods to give their work greater realism and to create custom effects. For example, Nathan Giffin of VerticalArtisans.com starts out by using texturing skins and stamps for his rock-patterned walls and then hand carves the overlay to give the rocks shape and definition. "The process is fairly simple, but it's tasteful, and looks realistic," he says.
Stamping and texturing
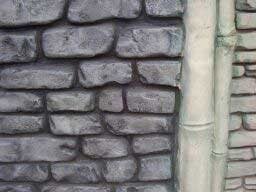
From left: cobblestone, bamboo, and sandstone patterns. FossilCrete in Pheonix, AZ
Stamping is the method of choice for many contractors because it's faster than hand carving and will produce more consistent results. However, when used alone, it won't permit the same degree of customization possible with hand carving.
To achieve the best results, wall overlay contractors typically use stamping tools designed specifically for vertical applications. These stamps are usually made from lightweight polyurethane or rubber and are often smaller and more pliable than stamps used for horizontal concrete slabs. Typically each stamp is designed to produce just one or two pattern units, allowing for randomized placement and easier stamping in tight spots and corners.
Rockandwater.com
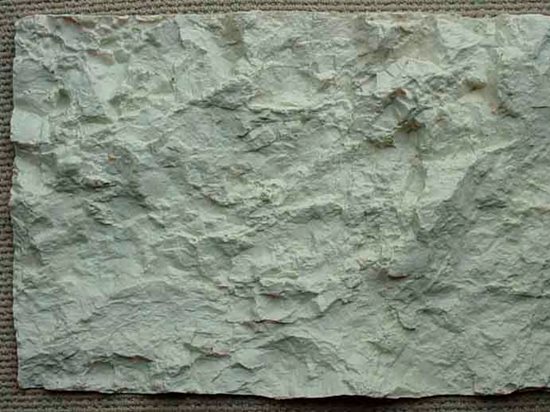
Texturing skins are simply much thinner versions of stamps. They are used to impart texture (such as the roughness of a natural rock face) to the wall surface rather than the deeper, well-defined patterns made by stamps. They can be used alone or to pretexture the wall surface before stamping or carving.
In addition to the more commonplace brick and stone patterns, vertical stamps and skins with unique designs and textures are available. You'll find textures like bamboo, brick, country cobblestone, cut coral, log cabin, grape vines, weathered wood, sea life, wildlife tracks, split-face granite, and The Great Wall of China, a stamp set molded directly from the actual centuries-old wall.
Hand carving
When contractors want to produce stone, brick or other wall patterns with deeper reveals and grout lines than possible with stamps alone, they often rely on hand tooling, or carving. Carving can also be used after stamping to correct any imperfections or to add custom detailing.
While carving is an excellent method for detail work, it can be considerably more time consuming than using stamps or skins. "It probably takes about 30% more time than traditional vertical stamping," says Giffin.
For his carved creations, Giffin uses a variety of tools including point trowels and pool trowels. Contractors can also use carving tools similar to those used for sculpting clay. Some vertical overlay suppliers also sell special tools to achieve unique effects. FossilCrete, for example, sells double-ended carving tools for carving out smaller grout lines or other detail work and a large carving tool for creating wider grout lines, such as you might find with random, stacked stone.
 Vertical Overlay Texture Tools
by Butterfield Color
Vertical Overlay Texture Tools
by Butterfield Color
 Vertical Wall Mix
40 lb Bag
Vertical Wall Mix
40 lb Bag
 Brickform Vertical Mix
Great for Carving or Stamping
Brickform Vertical Mix
Great for Carving or Stamping
 Butterfield Cantera Wall Mix
Just Add Water
Butterfield Cantera Wall Mix
Just Add Water
TIPS FOR GETTING THE BEST RESULTS
In addition to good surface preparation, many other factors can impact the success of overlay application. For installers just starting out with vertical resurfacing, here are some tips gleaned from wall overlay manufacturers and experienced pros for achieving the best performance and appearance. Before embarking on any vertical overlay project, it's a good idea to perform a mock-up using the same materials, tools and techniques to be applied on the job.
- When mixing wall overlay materials, it's important to get the proper ratio of liquid and dry components. If the mixture is too dry, it will be weak and could crumble away. If too watery, it will sag or run down the surface. It's better to start out with a little less water than called for and then add small amounts until the desired consistency is achieved.
- The overlay thickness will depend on the stamp profile depth or carving techniques used. If you are using a texture skin, you may only need 3/8 to 1/2 inch of material. For deep stamp patterns or carved joints, you may need to apply the overlay to a 2-inch depth or more.
- For thicker overlays (1 inch or greater), you'll get better results by applying the material in two coats. However, in order to prevent separation, don't let the first coat dry before applying the second one.
- Once you determine the appropriate depth, apply the material at a consistent thickness to ensure pattern uniformity. One way to gauge the depth and get an even thickness across the entire wall is to insert a ruler as you apply the material.
- The timing of stamping or carving is important to achieve a good impression without tearing of the surface. Generally, when you are able make a clean imprint in the overlay with your finger without lifting the material, it's time to begin. If the mix sags when it's stamped or sticks to your carving tools, wait a bit longer.
- Always apply a liquid release agent to your stamping tools to get a cleaner imprint and to prevent them from sticking to the freshly applied overlay.
- To keep placement of the wall stamps level, use a fixed point or edge such as a level floor or top of a wall. A string line will also work.
- After coloring the overlay with topical stains or dyes, finish by applying a sealer to protect your work and enhance the color, using a product compatible with the overlay mix and suitable for the exposure conditions. Because foot traffic isn't an issue with vertical surfaces, usually fewer coats of sealer are needed.

