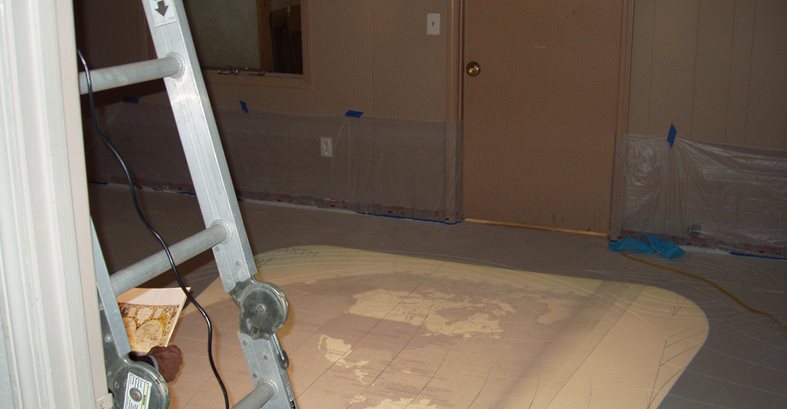
This is our old office floor, where we used an overhead projector to create a design of the continents.
At our new shop, we lifted the overhead projector with a forklift to create this large graphic.
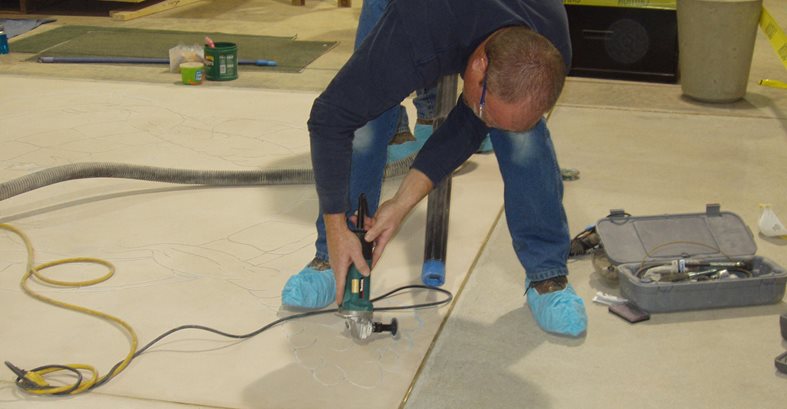
Cutting the design.
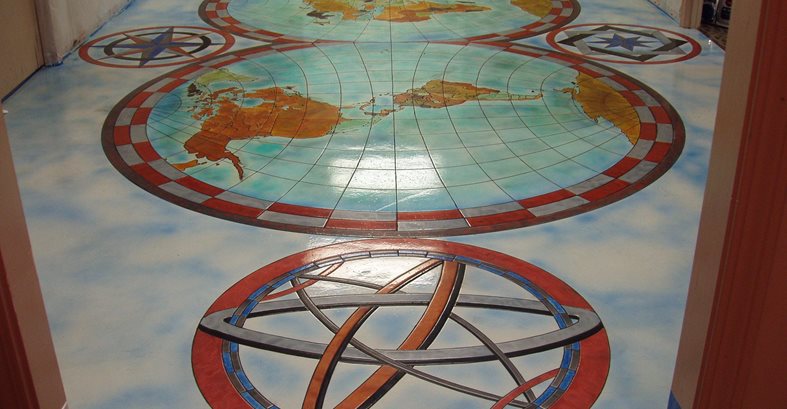
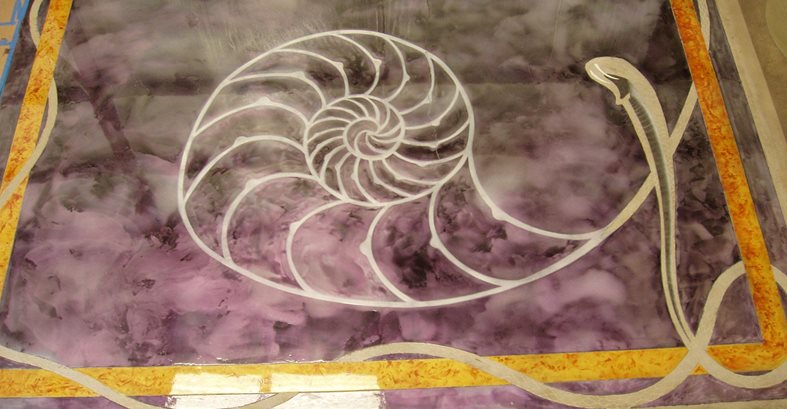
Here is the finished piece.
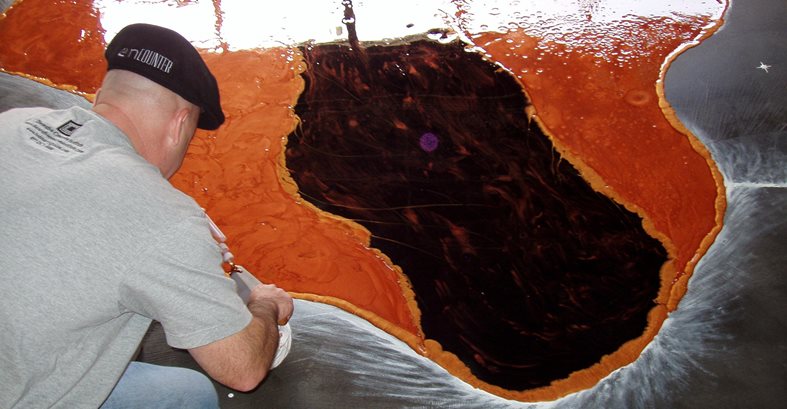
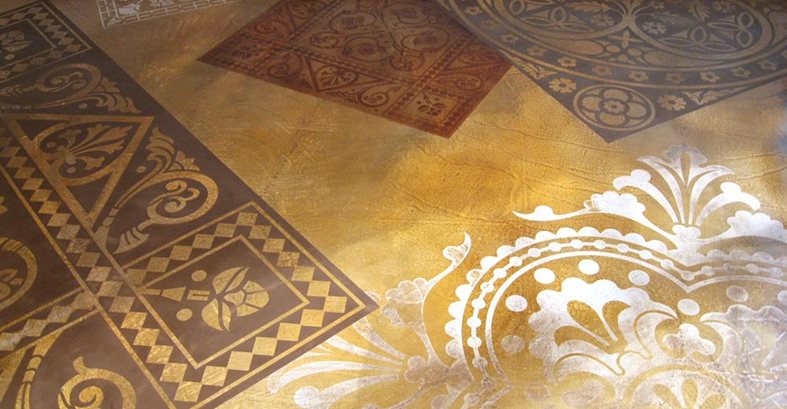
Applying epoxies free-hand. The inspiration for this design came from a book of images taken from the Hubble telescope.
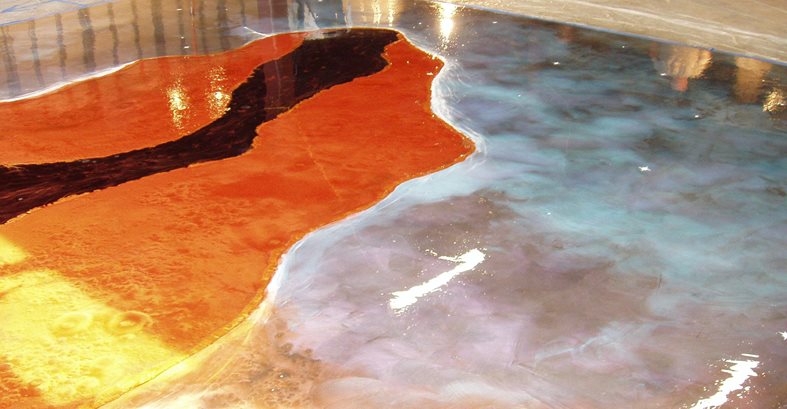
The finished design. The work represents a nebula.
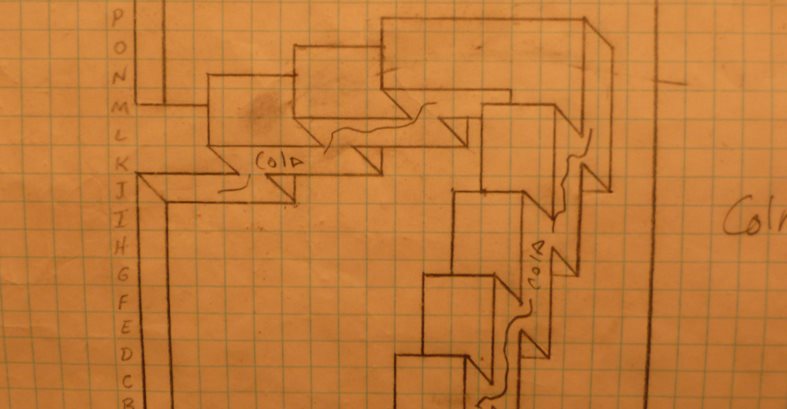
An example of a piece of art plotted on graph paper to be replicated on a corresponding grid on the floor.
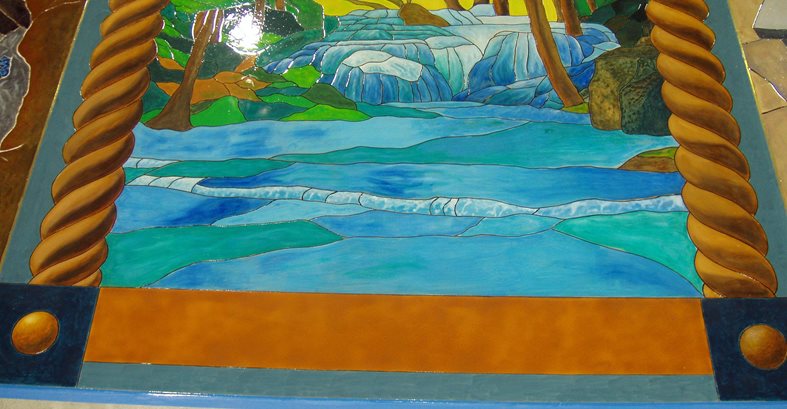
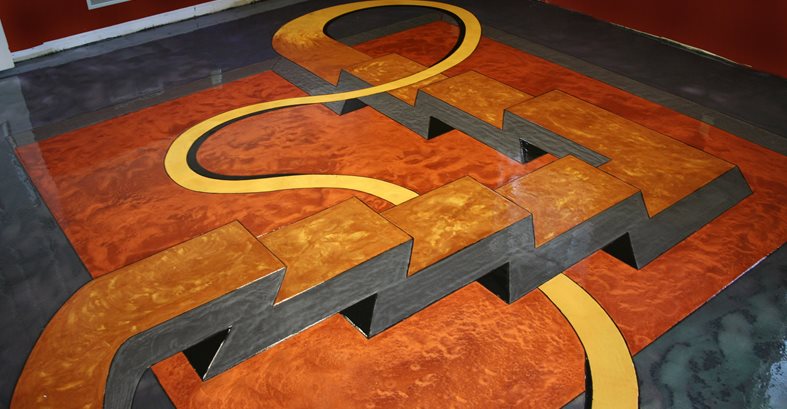
The finished piece. Note the cool 3-D effect.
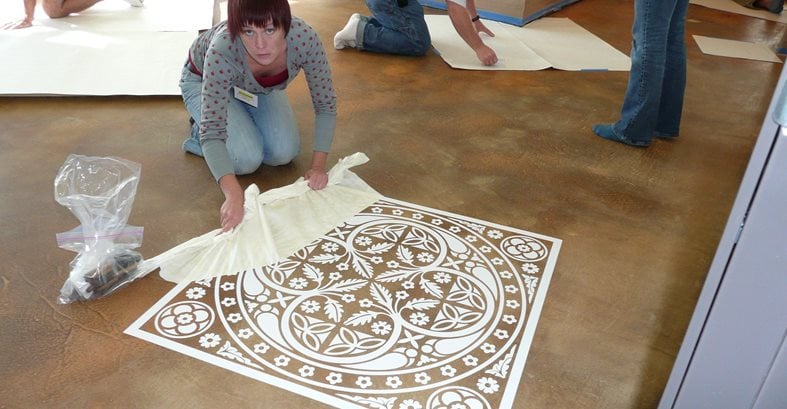
A Modello adhesive stencil being applied during a floor stenciling class.
A Modello adhesive stencil being applied during a floor stenciling class.
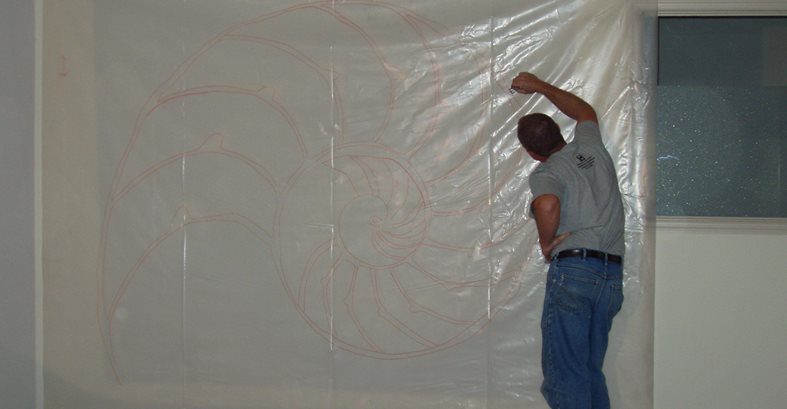
The first step in transfer pouncing is to tape a large piece of clear 6-mil plastic to a wall and project your artwork onto it so you can trace the design with a felt marker.
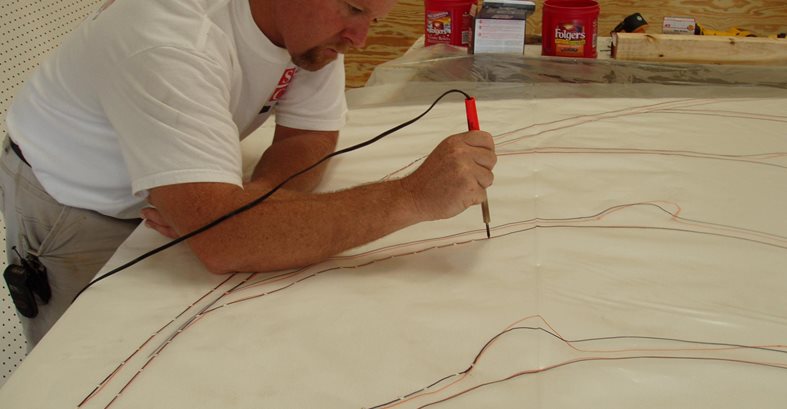
Now position the template on a piece of foam board and use a soldering gun to burn small holes through the plastic, following your traced outline.
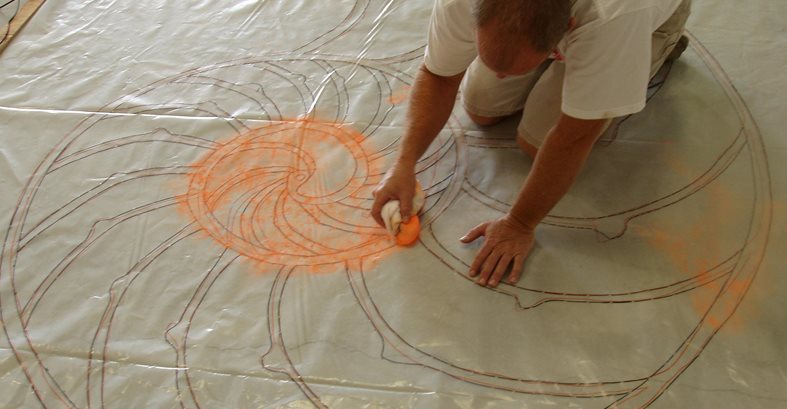
Position your template on the floor and "pounce" a sock filled with chalk over the burned holes.
After connecting the dots, you can then fill in your design with color.
Overhead projecting is a fast way of creating stunning graphics on concrete floors. The technique is simple yet very effective, and is the one I used to create the continents on our old shop floor. We typically use a standard overhead projector, just like the one grade school teachers used to use.
First, place the desired graphic or artwork on a photocopier and put transparency paper in the copy machine instead of standard paper. Be sure to print on the grainy side of the transparency, so the image doesn't smudge. Now it's time to attach the transparency to the overhead projector with small pieces of tape. The size you want the graphic to be will determine how high you need to position the overhead projector, which can sometimes prove to be challenging. Usually a step ladder along with some straps will do, but on occasion we have used our forklift to lift the projector and really increase the size of the image. Once you have everything positioned, turn off the lights, focus the projector and then start tracing the design on the floor with soapstone or chalk. The nice thing about using this method is that you have a graphic you can use over and over. I have compiled a book of over 100 transparencies that I refer to on a regular basis.
Free-hand designs using different mediums
Early on in my career, my work was very linear and geometric and I used sawcuts as demarcation lines to prevent one color from contaminating another. Then I started experimenting applying the same products but with no boundaries, and I discovered a whole new exciting world of colors and effects. Pigmented epoxies are probably one of my favorite mediums to use in a free-form fashion, since the effects you are able to achieve are unlike any other. To help me visualize the design, I like to have reference materials on hand to refer to for inspiration. My favorite reference book when using metallic epoxies is "The Universe," by Leo Marriott. This book contains unbelievable images taken from the Hubble telescope. Some of our craziest floors have been inspired from this book, as well as many others.
Creating visually dramatic graphics on concrete floors can make such a big impact that often your clients will be at a loss for words. When graphics are executed properly, with a dynamic design and the appropriate blend of colors, you will earn the respect you have worked an entire career to attain. But it's important to establish realistic expectations first, so your clients know exactly what they are getting. Even your best work may not please everyone.
As an example, we installed a large graphic of the continents of the world on the floor of our old shop before we decided to move out of the building. We had poured a white skim coat, which we colored using several different techniques along with a variety of mediums, including stains, dyes, metallic epoxies and urethanes. The result, shown here, was a beautiful, colorful graphic design. Several months after we moved out of the building, I received a phone call from the new owner asking me to come back and pick up an old desk we left behind, along with some mail. When I went to retrieve the items the following day, the owner was very abrupt and seemed to be angry. He asked me, "Are you the one that did this floor"? I answered yes, and asked what was wrong. He complained that the floors were so dramatic that they took the attention away from his displays, and he was sick and tired of talking about the floors with his prospective clients. I could only smile, which just seemed to make him angrier. This was a rare case of where beautiful graphics were not conducive to the environment. However, virtually everyone else who sees this floor asks how it was done and how long it took. Let's discuss the process I used, as well as four other techniques for creating gorgeous graphics.
Overhead Projector Coloring Video Time: 01:55 An overhead projector can easily be used to transfer high-end graphics onto a concrete floor in preparation for saw cutting or coloring.
When working with epoxies, remember that you have a limited time frame once you mix the A and B components. Typically the pot life is less than 10 minutes, which means you need to establish a road map before you start. Mixing smaller-sized batches will give you more freedom to create the desired effect and allow you to bleed one color into the next (wet on wet) to produce a seamless look.
Other materials that can be used for free-hand designs include pigmented cement-based skim coats, tints and dyes. You can apply skim coats using a variety of techniques, including hand trowels of various sizes, squirt bottles, and even smearing them in with your hands. Tints and dyes are awesome mediums to blend together to create vivid graphics. Practice and explore the endless possibilities with free-handing. Have fun, try using different materials, and let your inhibitions run wild.
Grid plotting
This technique, which I call "gridding," is an extremely effective way of creating graphics. It involves taking your original artwork and blowing it up to whatever scale you need to fit the area or given space. It's not uncommon for our students to feel very intimidated when they come to our classes, having little confidence in their ability to create art. When we show them the gridding process, most students are ecstatic. Even though they still have to draw the design on the floor, the grids help them map it all out.
You start by making a copy of your artwork that you can draw a series of grids over, or you can copy the artwork directly onto grid paper using a photocopier. The boxes on most grid paper are roughly ¼ X ¼ inch. Once you have the design positioned within the grids, you can determine the appropriate scale. From the top to the bottom, label each row with letters (a, b, c, d, etc.) and from the left to the right, label the columns with numbers (1, 2, 3, 4, etc.). Once you have completed this step, multiply the number of rows from top to bottom by the number of columns from left to right to determine the number of boxes. For example, a grid with 12 rows and 9 columns would have 108 boxes. Now determine the area on the actual floor where you plan to replicate the design, and increase the size of the boxes to fit this given area. If you increase the box size to 1 foot, for example, the graphic would end up being 12 x 9 feet, with ¼ inch equaling 1 foot. Now you can transfer the design to the floor using chalk or soapstone by looking at your grid paper and matching it to the corresponding grid on the floor. Start with grid 1-A, transfer the design onto the floor, and then move on to the next box. It may sound a bit confusing at first, but I guarantee once you go through this routine a couple of times, you will see what a valuable method grid plotting can be.
Adhesive-backed stencils
Stencils can be used in a wide variety of applications. Using precut vinyl stencils with an adhesive backing really speeds up the process because all you need to do is accurately position the stencil on the floor and then apply the desired products. One of our favorite looks is to precolor the slab with a variety of acid stain colors. Once the slab has been cleaned, neutralized and allowed to dry, we then stick on the vinyl stencil. After you position your stencil, make sure all of the intricate detail is securely stuck down. It's not a bad idea to mask off the area around the stencil in preparation for the next step, which is to apply a thick gelled acid. Simply dump a glob of the gelled acid on top of the area where the stencil is adhered, and then carefully squeegee the material around the entire surface using plastic spatulas or putty knives. Don't push too hard, since you could lift the tip of some of the fine detail.
How long the gelled acid stays down will determine how much of the base acid stain color is removed. I like to leave some of the acid-stained color, which gives the design a distressed look, so I typically remove the gelled acid after 5 to 10 minutes. I then squeegee off the remaining residue and gently clean the surface with a solution of baking soda and water. Once the surface is dry, it's time to remove the stencil to reveal a very antiqued-looking graphic.
There are many other materials you can use in conjunction with stencils, including air-brush applied dyes and pigmented skim coats applied in layers. We have used as many as five different overlays of stencils to create one overall design by first applying a pigmented skim coat as a base and then, once the base is dry, applying a second stencil with the next color. Each successive stencil protects the previous color.
For a deep reveal, you can also sandblast over stencils that are specifically designed for sandblasting. This type of stencil is much thicker and made from a material that resists the aggressive nature of sandblasting. This process is typically more labor intensive, but very effective. You can use traditional sandblasting equipment or, if containment is an issue on interior applications, use a shotblaster -- a self-contained machine that propels small steel media.
Transfer pouncing
This process combines a few of the previous techniques. It starts with the overhead projector, with your artwork on a transparency. Tape a piece of clear 6-mil plastic to a wall. As when projecting an image onto a floor, the distance you place the projector away from the plastic will determine how big or small your graphic will be. The closer to the wall you position the projector, the smaller the design. Once you have figured out the appropriate size, turn off the lights and trace the design onto the plastic with a felt marker.
The next step is to position the plastic template on a piece of ¾-inch-thick foam board. Using a soldering gun, burn little holes in the plastic following the outline you traced earlier. The foam board will allow the soldering gun to easily pass through the plastic to produce a clean hole. The distance apart you make the dots will depend on how much detail is in your artwork.
After completing this step, position your template on the floor and then use an old sock filled with orange chalk or baby powder to "pounce" over the burned holes.
When you have completed transferring the design to the floor, remove the stencil very carefully, using several people, if necessary, to help you lift the stencil straight up so you don't smear all of the little dots. The next step is to draw from dot to dot using soapstone or chalk. If you intend to then sawcut the design, you may want to spray a light mist of hair spray over the design to lock it down so the force of the diamond blade doesn't blow off the chalk during cutting.