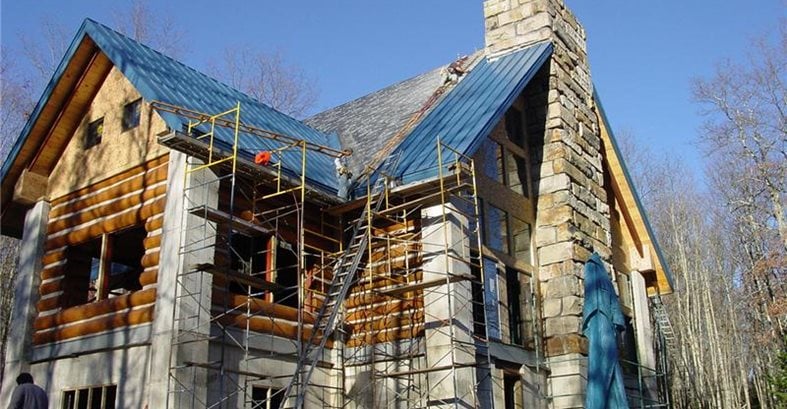
A view of the exterior of the Ahern's log cabin during construction. The massive fireplace on the right is built of cut stone Jim Ahern salvaged from an old bridge in Ohio. The cabin is located on more than 200 acres in the middle of 10,000 acres of national forest in West Virginia.
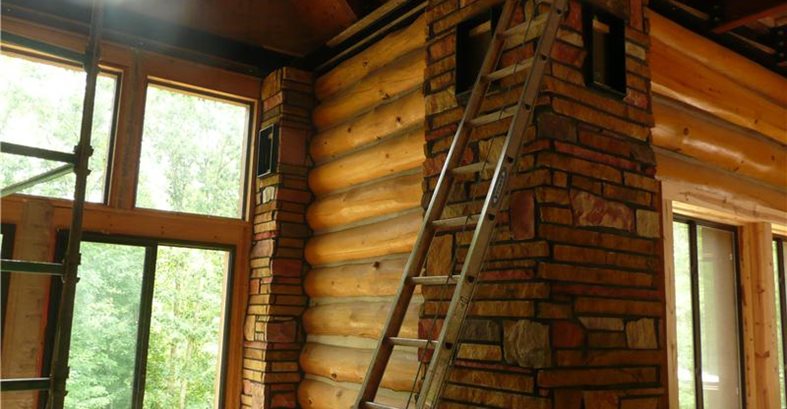
The fireplace is complemented by beautifully colored rock-veneered columns throughout the cabin. The stones served as the inspiration for the colors used for the decorative concrete floors.
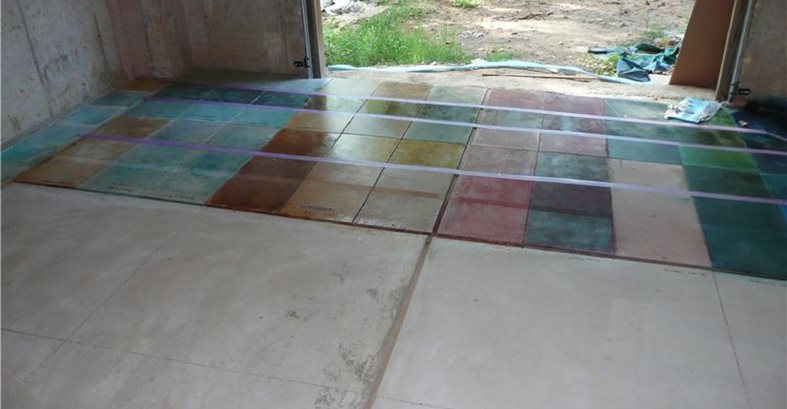
To come up with the best color scheme for the cabin floor, a sample area was set up in the garage to try out various stain and dye colors.
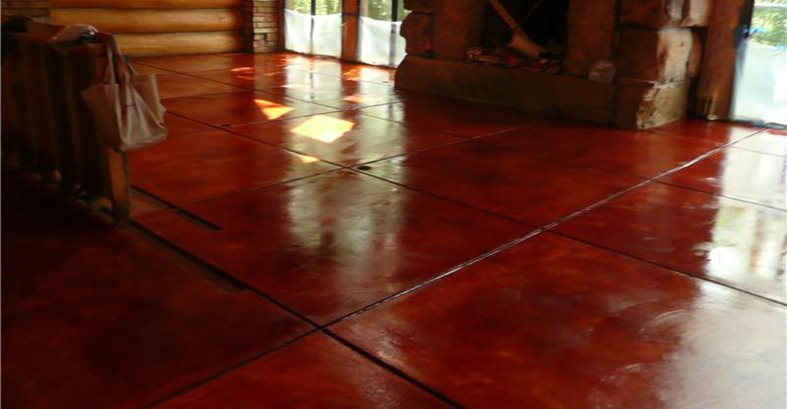
A close-up of the polished decorative concrete floor in the great room, showing the copper dividing strips and ammonite fossil inlays. The floor is also radiant heated.

Leaf designs were applied to the floor and colored with a solvent-based dye (DCI's Tree Bark). Real leaves were used for the templates.
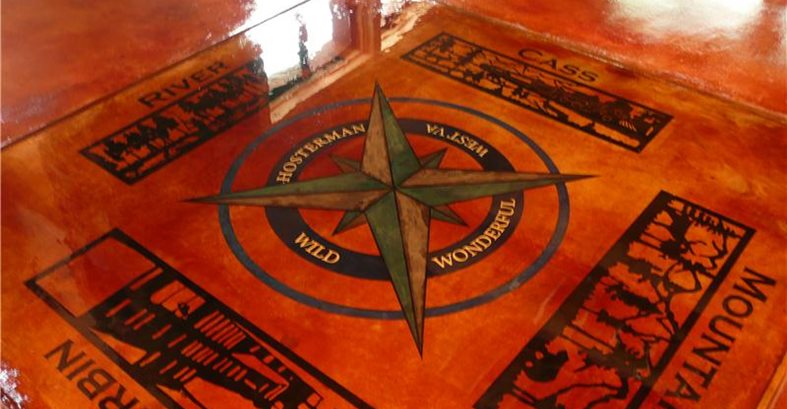
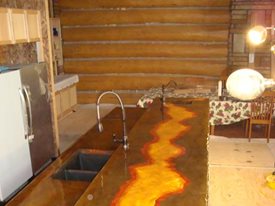
The focal point of the floor is a custom graphic design depicting geographical references for the cabin's remote location.
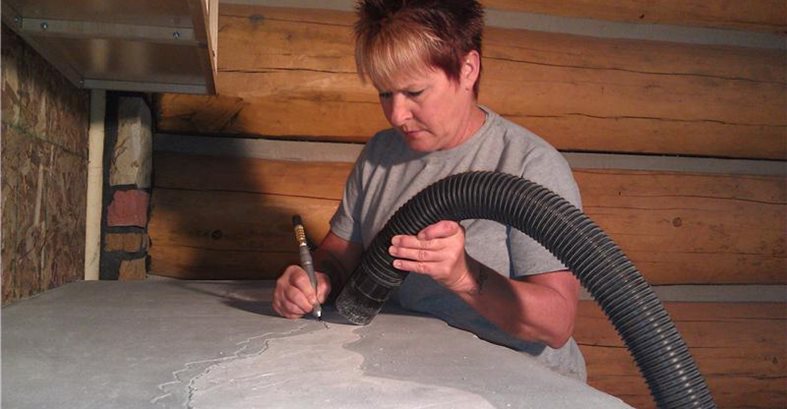
The veins in the countertop were engraved by hand, using the Wasp concrete engraving tool.
To the place where John Denver belongs, West Virginia, is where we recently found ourselves helping clients and friends, the Ahern family, on some very interesting decorative concrete applications. "Country road" hardly describes the arduous journey to ultimately get to the Ahern country cabin, which is located on more than 200 acres in the middle of 10,000 acres of national forest between the cities of Cass to the south and Durbin to the north, with a beautiful stream to the east and a sprawling mountain range to the west.
When Jim Ahern, an engineer by trade and successful heavy road and bridge contractor, took on the daunting task of building this beautiful cabin, he had very explicit structural and design criteria to adhere to. "The cabin was constructed with a minimum of a 100-year life expectancy, so five generations of Aherns could enjoy the cabin," he says. The vision that Jim and his wife Chris had was that their grandchildren would talk about this special place to their grandchildren, who would then tell their children about the cabin that their great great grandma and grandpa built.
That meant, of course, using materials that would last several lifetimes, including natural stone, sturdy white pine logs, and concrete floors and countertops.
Cabin design and construction
The cabin has three levels. Levels one and two are roughly 2,500 square feet each, with level three consisting of a loft and office totaling 1,500 square feet. When I asked Jim what his inspiration was for this unique design, he said it all started with the stone fireplace that he designed himself on his computer. "I developed the fireplace first, and then built the log house around it," he explains. "We knew we wanted a steep roof, which ended up being a 40-foot ridge beam height from the floor to the roof. The weight of the fireplace was phenomenal, considering the amount and size of the stones."
Jim calculated that his fireplace, which also has two flues, weighs in at a whopping 500,000 pounds. The stones he used came from a project he was working on outside of Columbus, Ohio, which involved tearing down an old bridge built with the best cut stone he had seen in his 40-year career. "Instead of disposing of the stone, we hauled it to our yard outside of Dayton, Ohio, before its final resting spot on our property in West Virginia," he says. That resting spot ended up being a concrete slab poured to the exact dimensions of the fireplace footprint.
As if the fireplace isn't spectacular enough, it is complemented by beautifully colored rock-veneered columns throughout the cabin that are impressive on their own. Constructing this massive work not only took plenty of ingenuity but labor as well. One of the biggest challenges, says Jim, was finding quality craftsman because of the location being so remote.
The logs used to build the cabin are 18-inch-diameter northeastern white pine, handpicked and peeled in Maine. "We went around with four different loggers and showed up twice a day to pick logs, then hauled them to a barn in Ohio and seasoned them (dried them out) for 18 months," says Jim. Once the logs were placed, the next step was to "chink," or fill the gaps between them, with mortar. "There are a lot of elastomeric caulking options, but we wanted to use a more traditional method. You need to be concerned about shrinkage, so we developed a mix design that included coarse sand, cement, glass reinforcement and liquid latex in place of water, placed over metal lathe between the logs. We spent quite an effort preparing this mix design, which worked out great," he says.
Stained concrete floors
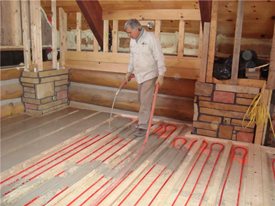
Despite plenty of other flooring alternatives, Jim chose stained concrete both for its beauty and ability to distribute radiant heat. "With a log home, you don't want forced air heat on the logs because it will cause isolated drying, so the best heat to use is radiant. The best way to distribute the radiant heat is through a concrete floor," he explains.