- Coloring Supplies
- Concrete Stains
- Concrete Dyes
- Color Hardener
- Integral Color
- Resurfacing & Overlays
- Concrete Coatings
- Concrete Overlay Supplies
- Concrete Resurfacer
- Vertical Concrete Overlays
- Terrazzo Flooring
- Concrete Countertops
- Countertop Mixes & Supplies
- Texturing & Patterns
- Concrete Stamps
- Concrete Stencils
- Concrete Engraving
- Forms & Molds
- Concrete Forms
- Concrete Molds
- Step Forms
- Concrete Polishing
- Polishing Equipment
- Concrete Densifiers
- Tools & Equipment
- Surface Preparation
- Concrete Tools
- Concrete Power Tools
- Concrete Pumps
- Protection & Repair
- Concrete Sealer
- Cleaning Concrete
- Concrete Repair
- Curing Concrete
- Vapor Barriers
- Foundation Waterproofing
- Concrete Mix
- Concrete Admixtures
- GFRC Mixes & Supplies
Concrete Underlayments over Wood, Concrete & More
Excerpts from Bob Harris Guide to Concrete Overlays & Toppings
Ardex Engineered Cements
Underlayments, unlike their overlay cousins, do not get a chance to see the light. Their main purpose is as a thin topping to level, smooth, or fix imperfections in concrete substrates prior to installation of other floor coverings, such as tile, carpet, or vinyl.
Despite their undercover status, underlayments require the same care in installation as a self-leveling overlay (see Chapter 15 for details in Bob Harris' Guide to Concrete Overlays & Toppings). Inadequate concrete surface preparation and priming might lead to severe pinholing or bubbling that could actually show through on some vinyl tile floors.
Installing Over WoodIt's also possible to install an underlayment over plywood subfloors, but additional steps are necessary to reduce the chance of cracking. Adding a liquid acrylic modifier to the underlayment mix will increase the flexibility and reduce the chance for cracking. Typically the modifier replaces a percentage of the water in the mix.

Installing a Concrete Floor over Wood
Time: 03:16
Find out how concrete floors are installed over a wood sub-floor.

Installing a Concrete Floor Over a Wood Subfloor
Time: 01:10
Concrete floor video on how to install concrete over an existing wood subfloor.
It's best to place the underlayment over 3/4-inch-thick plywood fastened with screws at 12- to 16-inch intervals to help decrease deflection and add stability. On projects where deflection of the plywood is a concern, some manufacturers recommend applying the underlayment over two layers of 3/4-inch plywood for better rigidity.
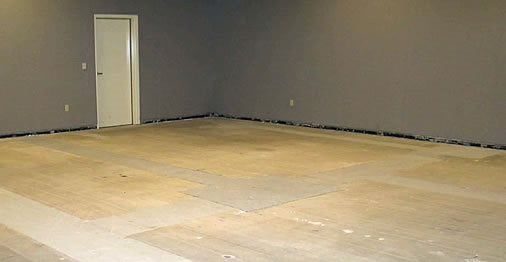
Next, attach galvanized metal lath to the plywood subfloor as a reinforcing material. I recommend screwing down the metal lath perpendicular to the direction of the plywood roughly on 6-inch centers, overlapping the sheets approximately 2 inches. Be sure to use enough fasteners to ensure flat, uniform installation. Some manufacturers suggest applying the underlayment directly over the top of the secured metal lath while others recommend first applying a repair-type mortar as a body coat over the lath. I like to use a polymer additive combined with cement, which provides some flexibility. However, make sure whatever product you use is approved by the underlayment manufacturer. After the repair mortar cures (if using), install the underlayment to provide a smooth, level surface. When placing an underlayment over metal lath, be sure the thickness is at least of 1/2 inch to reduce the chance of the lath pattern ghosting through to the surface. If youre going over an elevated wood subfloor that requires you to build thicker lifts, consider bringing in a structural engineer to make sure the floor will support the additional weight.
Installing Over ConcreteOn new concrete subfloors, a minimum of 28 days curing is usually necessary before installing an underlayment. For most jobs, you can use the same tools required for overlay installation. You'll need a gauge rake to spread the material into place and to control the depth. Then you'll need a steel smoothing blade to level the surface and break the tension, allowing any entrapped air to escape.
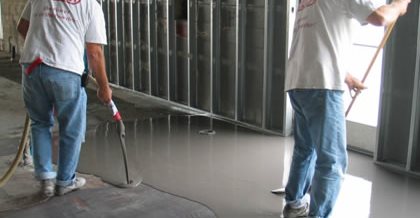
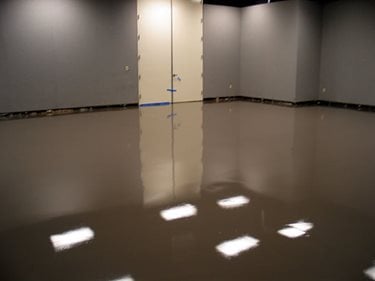
You can place underlayments in thicknesses ranging from featheredge to 1 1/2 inches in one lift. Using a gauge rake to spread the material into place will help to control the depth. - Ardex Engineered Cements
An underlayment flows onto floor surfaces like thick pea soup and requires minimal effort to smooth and level. - Ardex Engineered Cements
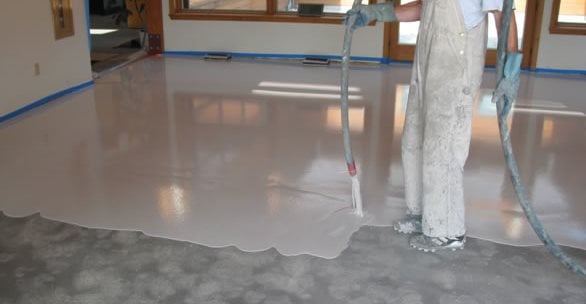
Just because an underlayment will be hidden under a floor covering doesn't mean you can overlook surface preparation. Before installing the underlayment, be sure to profile and prime the floor and fill in any chips, gouges, or spalls with a suitable repair material. - Ardex Engineered Cements
You can place underlayments in thicknesses ranging from featheredge to 1 1/2 inches in one lift. It's even possible to achieve greater thicknesses where needed by extending the material with pea gravel.
Related: Leveling a Concrete Floor
Using Pea Gravel to Increase Thickness
On one project I witnessed, a floor covering installer was trying to level a floor in preparation for vinyl tile. In some areas, there were capped-off drains approximately 3 to 4 inches below the finished floor elevation. The installer prepared the floor by shotblasting and priming, per the manufacturer's recommendations, and then dumped clean pea gravel directly onto the primed substrate, screeding it to a uniform thickness of about 2 inches. Then a crew pumped the underlayment over the bed of pea gravel while using a garden rake to blend the material in with the aggregate so it would filter down and come in contact with the concrete substrate.
I must admit that when I first saw this unusual approach, I was a bit skeptical. But after checking out the project over 3 years later, I found nothing wrong with the vinyl floor covering the top of the underlayment. If you plan to try this method, be sure to install a final leveling coat of the underlayment over the surface to smooth out any imperfections.
Tip: Using Metal Lath Over ConcreteMetal reinforcing lath can also be useful over badly deteriorated concrete substrates. On one project we were involved with, the concrete floors were unstable and full of cracks. After making all of the necessary crack repairs, we attached metal lath with an air-driven nail gun directly to the surface.
Keep in mind that even after performing all of the necessary prep work, it is common for cement-based toppings installed over wood to exhibit minor cracking. But in the case of an underlayment, this is usually not a concern since it will be covered up with some other flooring material.
Priming the SubstrateManufacturers may recommend priming the concrete or plywood subfloor to help seal it and reduce the chance for air vapor emitted from the substrate to form bubbles in the underlayment. Be sure to check the technical guidelines on primer recommendations, since some manufacturers require a different primer over wood than concrete.
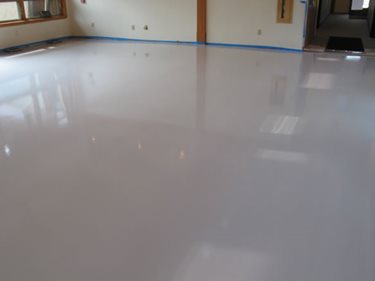
 When installed properly, an underlayment will correct unevenness and minor imperfections in concrete substrates to ensure a smooth base surface for tile, carpet, vinyl, andother floor coverings. Ardex Engineered Cements
If you're applying the underlayment to a wood subfloor in an area susceptible to moisture exposure, such as food prep facilities, its a good idea to apply a flexible waterproofing membrane over the plywood to provide additional protection. A variety of waterproofing systems are available. I have had good success using one that consists of a mixture of pure acrylic and cement mixed at a one-to-one ratio. After mixing, I trowel the material onto the substrate and embed a fabric mesh in it.
 LevelFlor®
Self-Leveling Underlayment
LevelFlor®
Self-Leveling Underlayment
 Fast Feather - Underlayment
Self-Drying - installs in as little as 30 minutes
Fast Feather - Underlayment
Self-Drying - installs in as little as 30 minutes
 EucoFloor SL160
Cementitious, Self-Leveling Underlayment
EucoFloor SL160
Cementitious, Self-Leveling Underlayment

