- Countertop Tools
- Pouring & Finishing
- Coloring Tools
- Overlay Tools
- Polishing Tools
- Saws & Engravers
- More Concrete Videos
- Floor Videos
- Countertop Videos
- Outdoor Living Videos
- Furniture Videos
- Demonstration Videos
- Concrete Tool Videos
- Concrete Stain Videos
- Sealer Videos
- Concrete Stencil Videos
- Concrete Stamps Videos
- Surface Preparation Videos
- Concrete Forms Videos
Polishing, Buffing & Burnishing Tools Videos
Click below on one of the polishing, buffing or burnishing tool videos:
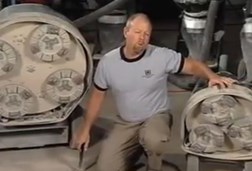
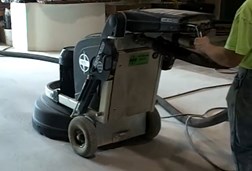
Concrete Polishing Machine - Orbital Grinder
Time: 02:45
Techniques for properly operating concrete polishing machines and dust collection equipment. This video covers basic operations of polishing equipment including how the equipment is used, the types of diamond pads and grits to use, power requirements, safety precautions, and the proper speed to run the machine when polishing. Begin the grinding with a coarse diamond polishing pad making one pass over the entire surface area before moving on to finer diamond pads. Coarser diamond polishing pads are typically a metal-bond, meaning the diamonds are suspended in a metal. Resin bond polishing pads are suspended in a resin and create a finer grit. Also consider power requirements at the job site. Smaller polishers require 220 single-phase power while the larger equipment require 480 three-phase power. This means you may need to rent a 45 kilowatt generator for the concrete polishing machine.
Propane High-Speed Burnisher
Time: 02:16
Propane high-speed burnisher demo by Bob Harris, president of the Decorative Concrete Institute. Harris explains the benefits of using a propane burnisher which is typically used for larger, indoor applications of polished concrete or stained concrete. He demonstrates how to use this high RPM machine, and explains that it is useful for a stained floor maintained with wax in which the tool is great for putting a high luster gloss on the floor. It is also useful for polished concrete, not only during the polishing process, but also as a general maintenance. Harris also mentions the types of pads to use for various applications.
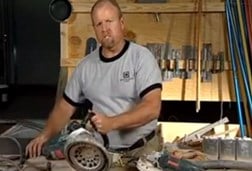
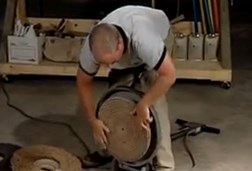
Handheld Dustless Grinder
Time: 04:03
Dustless grinders are used on a frequent basis to prepare a concrete floor for a concrete overlay or epoxy coating. This tool can also be used to remove sealers and light mastics. Surface preparation with these hand-held grinders is usual for indoor application where dust is a problem or in tight spaces where a walk-behind grinder will not fit. These are high powered machines so take the proper safety precautions. Dustless concrete floor grinders use a segmented diamond cup wheel to grind the surface. A shroud surrounds the cup-wheel to suction the airborne dust that is created during the grinding process. A smaller version of the dustless grinder can also be used for smaller concrete surfaces like concrete countertops, baseboards, or backsplashes. The smaller grinder also attaches to a vacuum that eliminates dust. This tool works with diamond pads in a variety of grits. Gradually grinding and polishing from a 50 grit to up to a 3000 grit will produce a high luster sheen. Be sure to wear the proper safety gear: eye glasses, ear plugs, dust mask and leather gloves.
Buffing Machine
Time: 03:33
The buffing machine is a valuable tool for concrete contractors to buff wax onto finished concrete floors as well as to clean concrete floors in preparation for a coating, acid stain, or water-based stain. This machine works with interchangeable pads. Each pad has a specific purpose: cleaning, buffing, or waxing. Bristle brush attachments are typically used to apply waxes to concrete floors while pads are used to clean the concrete surface. When doing general maintenance of concrete floors, use an all purpose cleaning pad. If you are doing surface preparation for an acid stain use a stripping pad to remove contaminants like drywall dust, paint, and other material on the concrete surface that will discolor the stained concrete floor. Be cautious when using buffing machines around walls. Lean your weight into the machine when you turn it on. To move the machine back and forth across the floor, simply lift the handle up to move it to the right or push the handle down to move it to the left. Small movements are effective, so only move the handle up or down in ¼-inch increments.
Polished Concrete Transitions and Joint Filling
Time: 03:18
Bob Harris shows how to create a smooth transition from a finished polished floor area to an unfinished area. First he shows a unique polished floor colored with a water-based dye. Rather than mask and hide the existing cracks in the floor, Harris explains how he filled them with a metallic copper joint filler to give them some added character which looks nice against the dyed and exposed aggregate floor. Then Harris explains how he creates a transition when polishing to get a smooth, uninterrupted look between a finished section of the floor and an unfinished section. His first tip is to polish at least 24 inches over the contraction joint which gives you enough working room to transition the floor polish to the same grit. Then he explains that you want to fill the joints of the floor. Here he used a two-component self-leveling colored polyurea material. He places the material in the joint, lets it sit for 30 minutes, then shaves it off flush. The he starts the coarse grinding. Following this technique helps preserve the joints and reduces chipping. During the coarse grinding, Harris shows how the grinding has dislodged some angular shaped sand particles in the floor which has caused pop-outs. The pop-outs detract from the overall finished floor, so he recommends filling in those as well.

