- Concrete Stencils Home
- Paper or plastic The pros and cons of each
- Stock or custom concrete stencils: Which type fits your design needs?
- Adhesive or nonadhesive stencils: When to use each type
- Concrete stencil patterns: View some of the options
- How-To Tips for Using Stencils
- Step-by-step process of applying stencils
- Using microtopping and stencils to rejuvenate ugly concrete
- Related Information:
- Stenciling Concrete Floors
- "Floor Me" video series: Stencil design ideas and techniques
- Concrete logos and graphics: Creating images with concrete stencils
- Bob Harris' five favorite methods for creating graphics on floors
How to Stencil Outdoor Concrete - Step-by-Step Process

Stenciling Concrete
Time: 01:32
Watch this overview of the basic steps to stenciling concrete
Stenciling can be done in both freshly placed concrete or in existing concrete that has been covered by an overlay (see Decorative Concrete Overlays: Exploring the Options). Here are the basic steps from ArtistiCrete LLC in Noblesville, IN:
Applying the stencils
After crews place the concrete, they screed, float and edge the slab in the usual manner and then place the stencils on the surface while the concrete is still wet but free of excessive bleed water. Placement requires two people, with one person holding the stencil roll while the other person holds the uncoiled end on the opposite side of the slab. Once the stencil is laid down atop the slab, it's plastered to the surface with a special stencil roller.
The stencil is placed and worked one strip at a time. Because the stencils are die cut, the strips must be aligned in a specific manner to ensure pattern continuity, similar to aligning strips of patterned wallpaper. After the entire slab is covered, workers use a pair of scissors to trim the stencil to about 1/8 inch inside the form boards (this allows for the stencil to swell a bit). A hand float is then used to stick down the edges.
 Stencil is unrolled pior to aligning it.
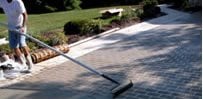 The stencil is applied to the surface with a stencil roller.
 Excess stencil is trimmed with scissors.
Adding color
The next step is to hand broadcast color hardener onto the surface (at the manufacturer's recommended rate) and work it into the slab with a bullfloat. This process is best done immediately after stencil application, while the concrete surface still has enough moisture to be absorbed by the hardener.
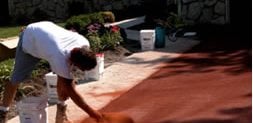

Color hardener is cast onto the slab and worked into the surface.
Adding texture
With stone or brick stencil patterns, the use of a texture roller or seamless texture skins will give the surface a more realistic, slightly roughened profile. With tile patterns, there is no need to texture the slab, Instead, a fresno or trowel can be used to smooth over any imperfections.
Before texturing, a liquid or powdered antiquing release agent is applied to the surface. When the slab is firm enough to accept the roller's weight and still plastic enough to receive the texture, workers can begin to go over the slab with the roller. Where the roller creates depressions in the surface, the pigment leaves shadows that mimic natural color variations. Manufacturers offer rollers with different textures to allow contractors to produce a variety of decorative effects.
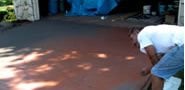 A powdered antiquing release is cast onto the surface.
 A texture roller is passed over the slab.
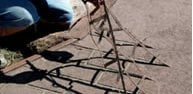 Lifting the stencil from the slab surface.
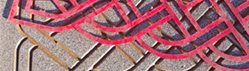 Reusable Urethane Stencils
New Technology - leaves crisp clean designs
Reusable Urethane Stencils
New Technology - leaves crisp clean designs
 Decorative Stencils
Adhesive or non-adhesive, slate, brick, etc.
Decorative Stencils
Adhesive or non-adhesive, slate, brick, etc.
 Paper Stencils
Thick, tear resistant & a wide variety of patterns
Paper Stencils
Thick, tear resistant & a wide variety of patterns
Revealing the results
As soon as the slab has been textured, it's time to remove the stencils. This is when the "wow!" factor comes into play and the pattern is revealed. The last piece of stencil laid is removed first, with a person standing on either side of the slab and lifting the stencil straight up from the ends. After the stencil is completely clear of the surface, it's carried off to the side and disposed of.
Finishing touches
The day after the pour, crews can clean off the release agent, saw cut the control joints and seal the slab surface.
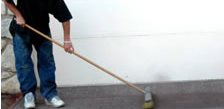 The next day, release agent is swept from the slab.
 The slab is cleaned with a pressure washer.
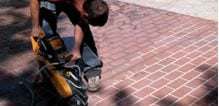 Crack control joints are sawed.
 Concrete sealer is applied.
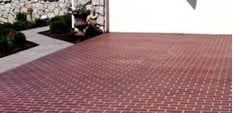 The finished job.
Tips for achieving great results with stencils

Concrete Stencils
Time: 01:45
Intriguing decorative effects are possible by using stencils with sandblasting and gelled-acid etching. View all 68 concrete floor design videos
Stenciling isn't a complicated process, but some general rules of thumb should be followed to achieve the best appearance. These tips will help to prevent cosmetic flaws that will be hard to correct once the job is done:
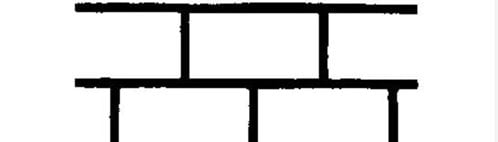
- For rectangular slabs, it's very important to square the forms so the corners are true 90-degree angles. Failure to do so will create problems when applying the stencil, because the "bricks" located at the slab's edge will get progressively larger or smaller.
- Don't embed the stencil too deeply with the roller, because this can cause excessive chipping of the edges during stencil removal. The stencil should only be plastered to the surface rather than buried under the concrete.
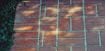
- The left side "mortar joint" on each new strip of stencil should be placed right over, rather than next to, the right side joint of the previous piece to create a single joint between stencils and to avoid misalignment. Some patterns, such as those with an irregular edge, are more challenging to align than others. Long spans of stencil can also be difficult to align.
Poorly aligned (left) vs. properly aligned stencil joint.
 ArtistiCrete LLC in Noblesville, IN
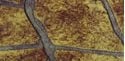 ArtistiCrete LLC in Noblesville, IN
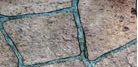 ArtistiCrete LLC in Noblesville, IN
- Forms weren't squared, so outside bricks are smaller along the edge of the soldier course.
- Never leave stencils on a slab overnight. Doing so will almost guarantee the need to pick it out in maddeningly small pieces, aided by a chisel, screwdriver or other scraping device.
- When the stencil is first removed, chips of color hardener that had lain atop the stencil will fall onto the slab. They should not be swept off until the following day. Waiting a day allows the concrete to set sufficiently so the broom won't mar the surface.
Contractors have differing opinions about the best time to remove stencils. Some installers prefer to wait a couple of hours after finishing the concrete before pulling up the stencil strips because this will yield cleaner pattern edges. However, it will also result in a very slick, smooth mortar joint that some customers find fake-looking. Immediate stencil removal results in more realistic chipped edges and a sandier-looking joint.
Applying stencils to existing concrete - sandblasting or acid etching?
These two popular techniques for stenciling hardened concrete involve removing a very thin surface layer of concrete, leaving the areas masked by the stencil intact to create a raised, three-dimensional pattern. In the case of sandblasting, you adhere the stencil to the concrete, then go over the area with a sandblaster, keeping the nozzle at least 12 inches above the surface. With etching, you brush-apply a gelled acid over the exposed areas not covered by the stencil, using a product that's thick enough so it won't bleed underneath.
Both techniques, especially sandblasting, can be tough on the stencil itself, so the material needs to be durable enough to stand up to the process. You'll also need to use a stencil with an adhesive backing that prevents movement. Be sure to ask the manufacturer if its stencil products are suitable for these applications. Brickform Rafco Products, for example, makes self-adhesive vinyl stencils designed to withstand sandblasting and light shotblasting. They are available in many stock patterns as well as custom designs.

