- Concrete Paver Information
- Concrete Paver Pictures
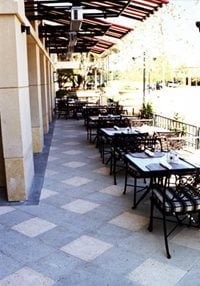
- Patio Pavers
- Driveway Pavers
- Pool Deck Pavers
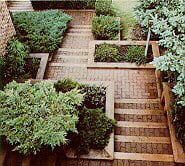
- Sidewalk & Walkway Pavers
- Porous and Permeable Concrete Pavers
- Installing Concrete Pavers
- Pavers Installation: Step-by-step overview of base compaction and mechanical installation
- Pricing of Concrete Pavers
- Paver Thickness & Specifications
- Other Resources
- Find Products: Pavers & Supplies
How to Install Concrete Pavers
10 steps for laying concrete pavers
Tile Tech Pavers
Listed below are 10 steps for paver installation. This is not an easy DIY project and is typically done by paver contractors who professionally install concrete pavers.
- Utility Service Inspection - Before any work starts have the utility company check for underground pipes and wires. Stake out location and depth of pipes and wires.
- Excavation - Removal of the existing pavement, turf, or existing soil to the proper depth. The proper depth will be finish surface, less paver thickness, setting bed depth, and base material. The amount of base material is often determined by a soil engineer and depends on the propensity of the soil to expand, saturate, or hold water. (Which would then cause the pavers to move.) Base thickness normally ranges from 6-inches to 12-inches. A base for vehicular traffic is typically 10-inches to 12-inches. In extreme soil or other conditions, the base can be up to 18-inches deep.
Note: Conditions are substantially different on the East Coast versus the West Coast. On the West, many jobs are done with 4-6" base material. It is critical you learn what works best in your area. Soils engineers can provide guidance in this area. -
Compact Subgrade - After the grade is down to the proper level (see "Excavation" above), and before the geotextile fabric is installed, the subgrade must be compacted.
- If the subgrade is clay, compaction must be done with a roller or rammer so the subgrade is fully compacted.
- If sandy soils, a plate compactor is often sufficient for subgrade compaction.
- Install "Geotextile Fabric" - In moist or wet areas, and where the soil is expansive, geotextile fabric should be installed to separate (and keep separated) virgin soil from the base.
- Install Base Material - Base material is installed in "lifts" no more than 4-inches at a time. A compactor is used to compact the material. The base material itself should be a granular type that compacts easily. The most common is a gravel base.
- Install Edge Restraints - The border "edge restraints" are now laid on the base material and secured with steel spikes which hold the edge restraints in place. Edge restraints are an important part of interlocking concrete pavements. By providing lateral resistance to loads, they maintain continuity and interlock among the paving units.
- Spread the Setting Bed - A 1-inch to 1 1/2-inch layer of sand is spread on top of the compacted base material. Concrete sand, coarse washed concrete sand, or granite stone dust can be used.
- Lay the Pavers - Pavers are installed in the desired pattern. Pavers should be taken from several pallets or bundles at a time to assure an even color mix.
- Compacting and Sweeping - Spread and sweep polymeric sand over the top of the pavers. Then the compactor is used over the top of the pavers. The sand will vibrate from below and above into the joints. Add more sand on top and continue the process until you fill the joints—which will make for a solid paver surface.
- Sealing - Sealing will accentuate the paver colors and help protect them from staining. Sealing does require reapplication periodically.
If you're interested in alternatives, stamped concrete provides a similar look to pavers. See how the installation differs: How to Stamp Concrete.

Tile Tech Pavers
Typical Concrete Paver Applications
The use of concrete pavers is growing rapidly on both commercial and residential construction projects. Pavers interlock together to form a patterned surface which can be put into service immediately. Pavers are manufactured in various textures and colors. A big benefit of pavers is that they can be removed and re-installed, which reduces future service interruptions.
Pavers are often used for the following applications:
- walkway pavers
- paver patios
- sidewalk pavers
- pavers for driveways
- project entrances
- a walkway through a city park
- playgrounds
- pool decks
- entrance to corporate offices
- around fountains
- streets (most of Germany is paver streets)
- airport runways
The popularity of pavers is expanding rapidly in the United States. There is plenty of growth to go: in Europe there are 100 square feet of pavers installed per person annually whereas, in the United States it is only 1 square foot per person. Insiders in the paver business say the market is on fire and poised to continue growing as the benefits of pavers become more well known.
Tile Tech Pavers
Paver Installation ConsiderationsProperly preparing the base material is critical to the paver installation.
First, the amount of base material needed is determined by local soil conditions.
Second, a Geotextile Fabric is installed to keep the native soil separated from the base material.
Third, the right type of base must be installed. It must compact when installed in 2-4-inch lifts. The base material itself should be a granular type that compacts easily. Each state has different names for the product use as base material. However there is a rule of thumb:
According to Dave Smith of the Interlocking Concrete Pavement Institute, base material for under a concrete paver job should be the same type as used by the State Department of Transportation under the roads in that area.
In California this is called "type 2 base". In some areas it is called "AB3", or "21A", or "three-quarter minus".
Paver Base Compaction RequirementsCompaction is done in 4" lifts to achieve the maximum density and load bearing capacity. Each layer will require several passes with the compacting equipment to achieve this.
Compaction should be at least 95% Proctor density (per ASTM D 698) for pedestrian areas and residential driveways. For areas subjected to vehicular traffic, compact to at least 95% Modified Proctor Density (per ASTM D 1557).
Weak or saturated soils may not reach the minimum levels of density and may have to be stabilized or require drainage to remove excess water.
Tile Tech Pavers
Mechanical Installation GuidelinesMechanical installation can decrease installation time and cost. Instead of placing pavers by hand one at a time, specialized equipment can place many pavers at once.
The units come to the site manufactured in the final laying pattern, stacked in layers of 35-40 pavers each. The equipment can lift and place a layer every 20 seconds.
With this rate of installation, construction time is decreased. Traffic disruptions are minimized, enabling faster opening of streets to traffic, service and emergency vehicles.

