- Concrete joints home
- Isolation joints
- Construction joints
- Contraction joints
- Locating & Filling Joints in Concrete Slabs
- Be active in deciding where to place control joints
- Joints in commercial floors
- Sealing joints- Tips for sealing and filling joints
- Related Information:
- How to build high-quality slabs on grade
- Groover tools for forming joints
Contraction Joints
What is a contraction joint? Compare saw cut vs. tooled joints


Now let's talk about what are arguably the most important type of joints—certainly the most likely to cause problems. Both isolation and construction joints are formed before the concrete is poured; contraction joints (or control joints) are "placed" in the fresh concrete before it has a chance to create its own joints—also known as cracks. What a contraction joint really is in the end is a crack in the slab that we force to follow a line of our own choosing. We create a weakened line across the slab and let nature take its course. When the slab does crack, that's called "joint activation."
Here are a few things to consider about contraction joints:

Video: Cut-Off Concrete Saw
Time: 04:22
Watch a demo of the cut-off saw and learn about this piece of equipment.
- After concrete is placed it is going to shrink. We can reduce shrinkage with good mixes, but it is always going to shrink and we need to accept that fact and know how to accommodate that shrinkage. A smooth, unrutted subbase and a moisture barrier directly under the slab reduce friction between the slab and the subbase and reduce internal restraint.
- Contraction joints are formed by saw cutting, by tooling a joint with a grooving tool, or by inserting a plastic strip into the concrete during finishing (zip-strip). Proper timing and depth of cut are essential. If you wait too long, the slab will crack where it wants to rather than where you want it to. And if the joint is not cut deep enough it will not create the plane of weakness needed to guide the crack.
- Saw cuts can be made with conventional wet-cut or dry-cut saws or with early-entry saws.
- Using an early-entry saw, saw cuts can be made within 1 to 4 hours, depending on the air temperature—much earlier than with a conventional saw. Only Soff-Cut (now part of Husqvarna) makes a true early-entry dry-cut saw (sometimes called ultra-early-entry saws). The saw-cut is typically 1 inch deep regardless of slab thickness—although even ¾-inch deep early-entry cuts can function properly. Keeping the skid plate and blades in good condition will improve the cut quality (less raveling). There is now an early entry saw made specifically for decorative work.
- Conventional wet-cut gas-powered concrete saws can be used to cut joints, typically waiting until the concrete achieves a strength of about 500 psi to prevent raveling of the cut edges during sawing. The timing varies depending on the temperature and the relative humidity, but the window is generally 4 to 12 hours after concrete placement. The cut depth should be at least ¼ the thickness of the slab.
- For decorative work or smaller slabs, a regular dry-cut cut-off saw can be used. Be sure to use a proper respirator—airborne silica is a serious health hazard, leading to silicosis. Also use eye and ear protection. For a demonstration of using a cut-off saw, check out Bob Harris's video.
- There are several methods for tooling a joint into a concrete slab during the finishing operations, but as with a saw cut, the depth of the groove needs to be at least one-quarter the slab thickness to weaken the slab enough to get the crack to follow. For more information on groovers, and a demonstration video with Bob Harris, click here: Groovers Info & Demo Video.
- Zip-strips are plastic strips embedded into the concrete to create the plane of weaknesses needed to guide the cracks. Some come with a capping strip that is removed to leave radius edges or a sealant reservoir in the top part of the joint. ACI 360 and 302 do not recommend the use of zip-strips to form contraction joints.
- The jointing pattern may or may not be specified on your job. Take an active role in this plan to assure that joints are properly spaced and in the best locations for your work. For more information, read about Where to Place Control Joints.
- For an unreinforced slab, control joints should be spaced in feet 2 to 3 times the slab thickness in inches. In other words, for a 4-inch slab, space the joints 8 to 12 feet apart. The spacing is highly dependent on the concrete mix's shrinkage potential. Read more on low-shrinkage concrete mixes in the Concrete Mix Design section. Low cement content and larger aggregate are key.
- Jointed panels should be as close to square as possible. Keep the length divided by the width of a panel (aspect ratio) no more than 1.5 (so if the panel is 12 feet long it should be no less than 8 feet wide). Avoid L- and T-shaped panels.
- Contraction joints should be straight and continuous, never staggered.
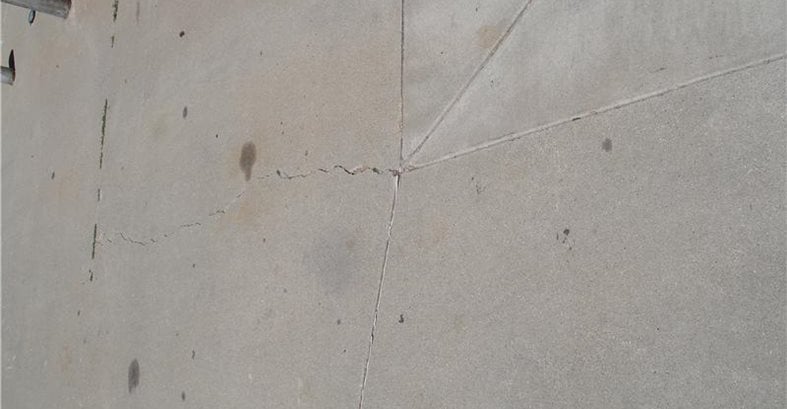
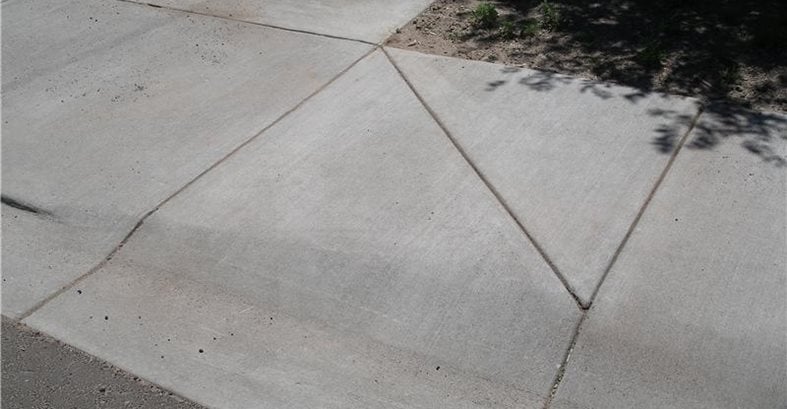
- Try to avoid "re-entrant" corners—inside corners within the slab. You're likely to have some, though. The best way is simply to locate joints going both ways from a re-entrant corner. You can also place a couple of pieces of rebar diagonally in the slab near the corner.
- In most cases, do not extend reinforcement through a contraction joint. Although this will provide load transfer, it will also lead to uncontrolled cracks between contraction joints.

Plastic zipstrips sometimes come with a removable top to create a clean joint. Cardinal Mftr. Co.
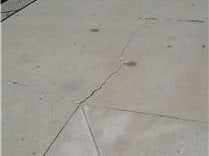
When a joint tees, a crack frequently forms on the other side of the joint.

