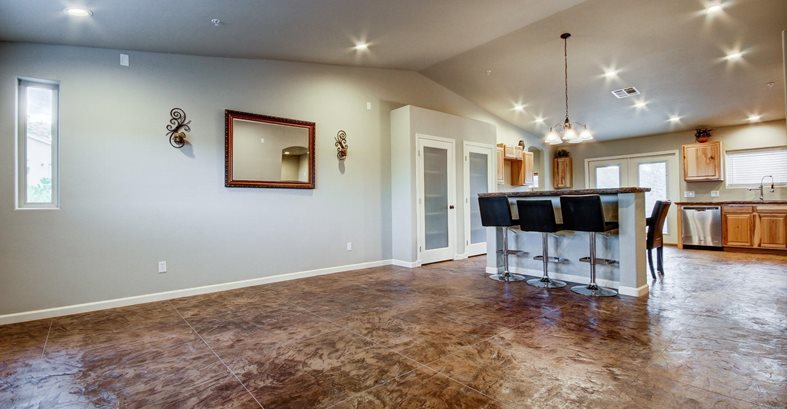
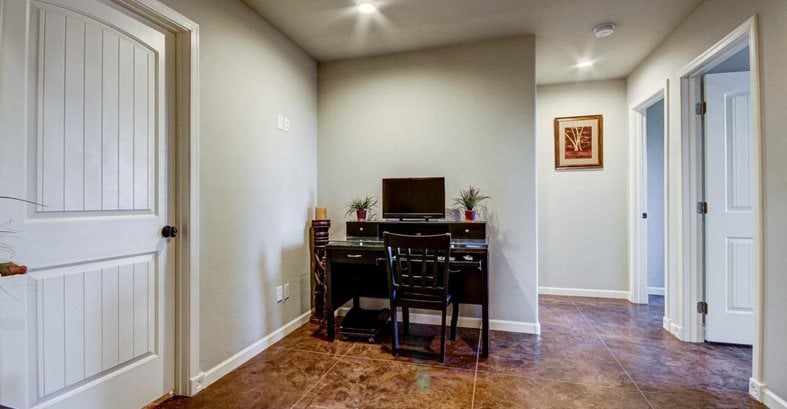
This stamped, colored, and sawcut concrete floor replicates the rocky terrain of Sedona, Ariz., and was a more economical option than installing natural stone tiles.
Because the homebuilder had to pour a concrete slab for the foundation, coloring and stamping the concrete eliminated the expense and hassle of installing another type of flooring material later.
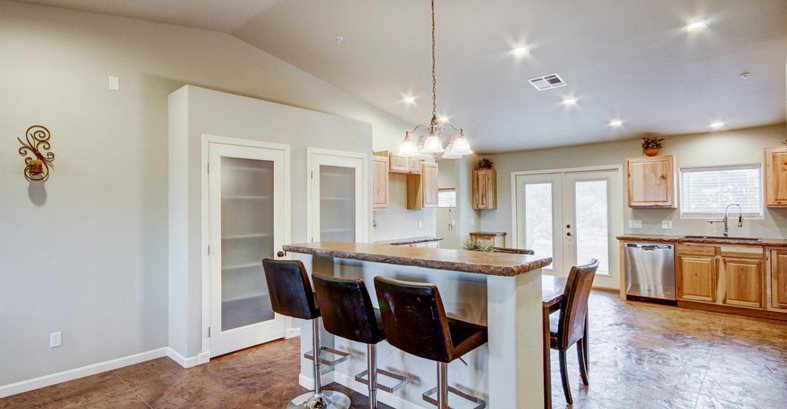
In the kitchen, Flortek also installed concrete countertops with a chiseled-stone edge detail to complement the flooring.
Project highlights
- If you’re pouring a concrete foundation slab for a new home, why not turn it into a decorative floor at the same time? That was the reasoning behind the installation of this stunning stamped concrete floor, completed by Tim Kollat of Flortek LLC for a residential developer in Sedona, Ariz.
- The floor, which extends throughout the main level of the home, was placed with integral color, accented with a powdered release agent, and stamped with an Italian slate texture. To replicate large slabs of stone, it was then sawcut into 3-foot squares and grouted.
- In the kitchen, the look of the floor is echoed in the concrete countertops, which feature the same color scheme and edges formed to resemble chiseled stone.
Find stamped concrete contractors near me
Why concrete?
The client wanted the look of large slabs of stone for his floors rather than the typical 18x24-inch tile. “Sedona is well known for its red rocks and mountains, and he wanted to bring the natural look of stone into an open, airy floor plan,” says Kollat. “To have a natural stone floor installed with slabs of this size would have been far too costly. We have poured stamped concrete for him in the past and he really liked how natural it looked and how easy it was to maintain, so he thought it would be a perfect fit for a residential floor. It also kills two birds with one stone -- you get the foundation and the finished floor all in one shot.”
How it was done
The slab was integrally colored with a buff tone and placed in three separate pours. During stamping, two colors of powdered release agent were used to provide the natural color accents. The client chose Italian slate for the pattern because the texture is light and has no deep indentations that would make the floor difficult to clean.
Related:
Flortek laid out the pattern for the 3x3-foot grid and then used a worm-drive saw attached to a cart to make the cuts, following a straight edge to keep the cuts perfectly straight. The cold joints between the slab pours were also opened up with the saw to integrate them into the pattern. Before filling the sawcuts with a sanded grout, an initial coat of sealer was applied so the grout wouldn’t stain the surface and to make the removal of residual grout much easier.
Project challengesPlacing a concrete foundation that is going to be the finished floor presents some unique challenges, says Kollat. “Typical concrete floors that receive some kind of floor covering are generally placed all at once, but being that this was stamped concrete we could not place the entire slab in one pour. Deciding where to stop a pour became a factor, because this stopping point becomes a visible cold joint.”
Each cold joint had to be strategically placed so as not to interfere with the pattern that was to be sawcut later. That required locating the stopping point for each pour to land right where a sawcut would be.
Flortek also had to take precautions to protect the finished floor during construction of the rest of the house. “After the interior walls were roughed in, the floor was covered with rosin paper to protect it. All trades were told that the slab was the finished floor, so care was taken to not damage it. Even though it was covered, it is inevitable that some trades will get paint or something else on the floor in spots, but being that the floor was sealed, everything cleaned up easily and then a final coat of sealer was applied,” says Kollat.
What’s trending
Even though one of Flortek’s specialties is stamped concrete, they don’t get many clients wanting this decorative treatment for their residential floors. But this project could jumpstart a new trend. Kollat has now installed three stamped floors for this client after he did the first one for him. “The client and the new owners of the house were extremely happy with the results. He told me that everyone who came to look at the house said how nice the floors were and how they thought it was real stone,” he says.
As for commercial concrete projects, Kollat says that grinding and polishing with the use of dyes is very popular. “One trend that I see moving forward is the diamond polishing of self-leveling overlays. Architects/owners that want polished concrete but have a concrete floor that is in too bad of a condition for polishing can have a self-leveling overlay installed, then ground and polished. We have done a couple of these floors and they turn out fantastic.”
Materials used
Integral color: San Diego buff, from Davis Colors
Powdered release agent: Cohills Pro Series Release Agent in coach house brown and saddle tan, from Cohills Building Specialties
Sealer: Cohills high-solids solvent-based clear. Final seal tinted with saddle tan release
Texture stamp: Italian slate seamless texture, from Cohills
Contractor:
Tim Kollat
Flortek LLC
Glendale, Ariz.
Submit your own project photos
See more Interior Concrete Floor Projects