Concrete Testing
Information on testing procedures for fresh concrete for slump, air content, unit weight and moreFor the smaller residential concrete contractor, concrete testing may not be routine practice and even seem like an inconvenience. But the relatively small cost associated with testing pays for itself rather quickly when problems or questions arise on projects.

Assessing the properties of fresh concrete during placement leaves a contractor in a better position to respond to any problems that ensue, such as low strength or cracking. Fresh concrete test data such as slump and air content can help indicate possible causes and guide the troubleshooting investigation. Was excess water added? Was the air content too high or too low?
Need your concrete tested? Find concrete contractors near me.
You should take concrete testing seriously and start off on the right foot by securing the services of a certified testing laboratory (see ASTM C 1077) employing field and lab technicians that are ACI-certified. This will give you the greatest assurance that proper sampling and proper field and laboratory tests are conducted.
TYPICAL FRESH CONCRETE TESTS
So what tests are typically run (or would be beneficial to conduct) on a smaller-size construction project? Here's a basic checklist:
| ASTM C 172 | Sampling Freshly Mixed Concrete |
| ASTM C 1064 | Temperature of Freshly Mixed Concrete |
| ASTM C 143 | Slump of Hydraulic-Cement Concrete |
| ASTM C 231 | Air Content of Fresh Concrete by the Pressure Method |
| ASTM C 173 | Air Content of Fresh Concrete by the Volumetric Method (Roll-o-meter) |
| ASTM C 138 | Density (Unit Weight), Yield and Air Content of Concrete |
| ASTM C 31 | Making and Curing Concrete Test Specimens in the Field |
The list is not as long as it seems. If you work in the concrete industry, your work or your materials are likely to be affected by these test results. Each procedure or test method must be conducted properly and within the required time frame to be comparable. Fresh concrete tests run along with a set of compressive strength cylinders are: slump, air content, unit weight and temperature. Data from these tests is helpful in assessing mix production and consistency in performance. Although sampling and making and curing test specimens are not test methods per se, they are important practices because subsequent tests depend on the manner in which the concrete was sampled and the manner in which the test samples were made.
For more detailed information on these and other test procedures, visit www.astm.org. Another good resource is ACI 214, Recommended Practice for Evaluation of Strength Tests Results of Concrete, available from the American Concrete Institute.
SAMPLING
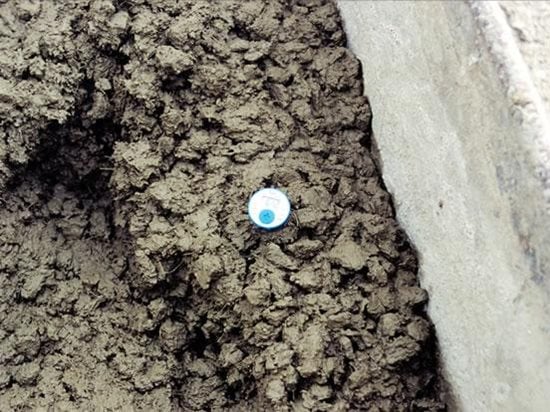
Sampling (per ASTM C 172) is the first step in determining if the concrete placed complies with specifications. The guidelines are to take composite samples of sufficient total volume (1 ft3 minimum) from the ready-mix truck after 10% and before 90% of the load has been discharged. These samples must be taken no more than 15 minutes apart and remixed to yield a composite sample. They are then covered to protect against rapid evaporation and to avoid contamination.
TEMPERATURE
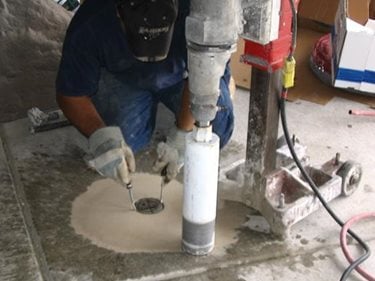
Here, the temperature is being taken after concrete placement, but ideally it should be taken prior to placement to respond to temperatures outside of a specified range. The thermometer is placed to provide at least 3 inches of concrete around the
inserted stem and left in place a minimum of 2 minutes and until the temperature has stabilized.
Start taking temperature measurements of the concrete (per ASTM C 1064) within 5 minutes after securing the remixed composite. The thermometer should be accurate to 1° F. The concrete should be in a wheelbarrow or other suitable receptacle that will permit insertion of the thermometer so that at least 3 inches of concrete surrounds the stem. As long as sufficient concrete surrounds the thermometer in your sample, it should remain inserted for a minimum of 2 minutes while all the other tests are being conducted. After the 2 minutes elapse, the test is complete once the reading remains stable to within 1° F.
Temperature measurements can also be taken in the transporting vehicle or within the forms as long as 3 inches of concrete surround the thermometer. Measuring concrete temperature in the forms (see photo) is not really a recommended practice since the "toothpaste" is already out of the tube. But if the measurement was missed in the rush of getting everything else done, taking the measurement post-placement will suffice.
Testing tip: A common mistake many people make is to remove the thermometer to read the temperature. Be sure to read the dial while the thermometer is still inserted into the concrete.
CONCRETE SLUMP TEST
Slump tests (ASTM C 143) are applicable for concrete with slumps greater than 1/2 inch and less than 9 inches (read more about concrete slump). Once the concrete sample has been remixed, start taking the slump tests within 5 minutes. Start by filling a mold 12 inches high in the shape of the frustum of a cone that is 8 inches in diameter at the bottom and 4 inches in diameter at the top. Fill the mold in three equal layers by volume, not by height. Rod each layer 25 times with a bullet-tipped 5/8-inch diameter rod to compact each layer. After filling and rodding, raise the cone to allow the concrete to subside. The distance the concrete subsides, or slumps, is based on its consistency.
Measure the amount the concrete slumps or settles from the original height of 12 inches to the nearest 1/4 inch and record as the slump in inches. The measurement is made between the original height of 12 inches and the displaced center of the settled mass of the demolded concrete. If the test falls outside of the specified range, a check test is typically performed to confirm test results.
Testing tip: Since concrete setting is time and temperature dependent, this test must be started within 5 minutes after obtaining the composite sample and completed within 2 ½ minutes after the filling process begins.
AIR CONTENT
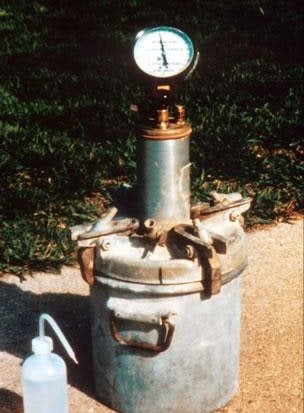
A Type B pressure meter is used to determine the air content of normal-weight concrete. The air content is read at the dial, which is calibrated for each apparatus. The aggregate correction factor (explained in ASTM C 231) must be subtracted from your reading to obtain the net air content. (Photo courtesy of PCA.
Air-entrained concrete is typically specified in areas of the country where frost-related damage can occur. The measurement of air content in fresh concrete of normal density is typically performed using the pressure method (ASTM C 231). Another useful test is ASTM C 173. However, the pressure method is frequently preferred because it is relatively fast.
You should begin the test within 15 minutes after obtaining the composite sample. Start by filling the 0.25 ft3 base of the air-content test device in three equal layers, and rod each layer 25 times. After rodding, strike the outside of the base with a mallet 12 to 15 times to close any air voids. After completing the three equal layers, strike off the bowl flush at the top to completely fill the 0.25 ft3 volume. At this point, it can be weighed as part of the calculation to determine the fresh concrete unit weight.
Next, latch the top of the air-content test device over the base and fill the air gap between the top of the struck-off concrete and the underside of the top of air meter with water. The meter top is then pressurized with the built-in hand pump until zeroed out (or as calibrated). After a stabilization period, release the pressure in the top and read the air-void content on the dial on the top of the meter. Subtract the aggregate correction factor from the dial reading and report the final value.
Testing tip: A typical air content for concrete with a ¾-inch maximum-size aggregate is about 6%, and specified ranges in air content are typically minus 1 ½% and plus 1 ½% of the target value.
DENSITY (UNIT WEIGHT)
The density (unit weight) of concrete (ASTM C 138) is measured using a Type B pressure meter (see photo) to verify agreement with the approved project mix design. The information obtained through this test can also be used to determine yield and relative yield, which helps you verify that you are getting the volume of concrete you ordered and paid for. You can also use this data to calculate the air content of the mix.
The unit weight is determined by the formula below. Subtract the weight of the measuring base from the combined weight of the measuring base and the concrete it contains. Next, divide this weight (in pounds) by the volume of the measuring base (cubic feet) to obtain the density expressed as lb/ft3:
| D = (Mc - Mm) / Vm | ||||
|---|---|---|---|---|
| D | = | Density of the concrete, lb/ft3 | ||
| Mc | = | Weight of the measure holding the concrete | ||
| Mm | = | Weight of the empty concrete measure (base of air meter) | ||
| Vm | = | Volume of the measure (usually about 0.25 ft3 for a pressure meter base) (Fig. 3) | ||
Testing tip: Having the unit weight data gives you "a third point to check a straight line." For example, when slump increases, the air content will generally increase. If significant, look for the unit weight to decrease measurably. If that is not reflected in the test results, keep an eye on the testing and examine the data, procedures, or reporting accuracy.
CONCRETE CYLINDER TESTING
Test cylinders (ASTM C 31) are cast to verify the specified compressive strength of the mix has been achieved. Typically 6-inch-diameter by 12-inch-tall plastic molds are used. Some projects use 4-inch-diameter by 8-inch-high cylinders.
Fill the 6-inch-diameter molds in three equal layers, rodding each layer 25 times. (Fill 4-inch-diameter molds in two equal lifts.) After rodding each layer, tap the outside of the mold to remove any remaining air voids. Once the mold is filled, strike off the top layer of the concrete with the top of the mold and store the molds at temperatures of 60-80°F, leaving them undisturbed. Good field practice would be to place the set of test cylinders in a cure box (shown here) until it is picked up and brought to a lab for curing until the date of testing. Typically a set of four cylinders are cast, with two tested at 7 days and two tested at 28 days. Specifications can, of course, call for other test dates as needed.
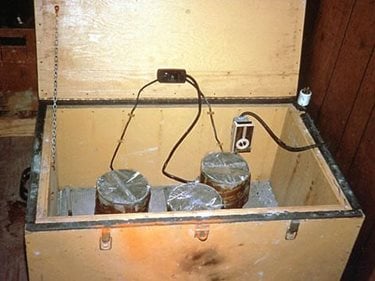
A cure box on a level surface with temperature control is ideal for keeping cylinders within the proper temperature range (60-80°F) prior to pickup, up to 48 hours after casting. (Photo courtesy of PCA.)
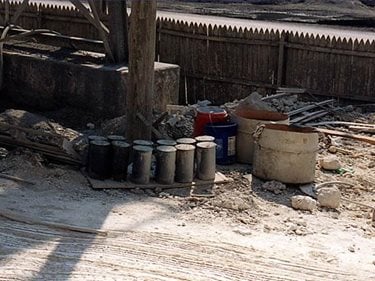
Leaving test cylinders in the sun for too long will cause problems later. Cylinders should be placed on a level surface and protected from the elements for up to the first 48 hours, with the tops covered to prevent moisture loss.
Testing tip: Test cylinders that are poorly made, stored, or neglected will cause headaches and may result in the need for costly hardened concrete testing, all to provide the owner information proving that the actual in-place concrete is of sufficient strength and durability. While this procedure is simple, do not take it lightly. There are a number of reasons why cylinder strengths might be compromised by poor practice, as shown in the table below.
EFFECTS OF SELECTED TESTING ERRORS*
| Condition | % Reduction | Effect at 10,000 psi |
|---|---|---|
| Rough ends before capping | 27 | 7300 |
| Reuse of plastic molds | 22 | 7800 |
| Use of cardboard molds | 21 | 7900 |
| Convex end, capped | 12 | 8800 |
| Eccentric loading | 12 | 8800 |
| Out-of-round diameter | 10 | 9000 |
| Ends not perpendicular to axis | 8 | 9200 |
| Thick cap | 6 | 9400 |
| Sloped end leveled by cap | 5 | 9500 |
| Chipped cap | 4 | 9600 |
| Rebar rodding | 2 | 9800 |
| 1 day at 100°F/27 in lab cure | 11 | 8900 |
| 3 days at 100°F/24 in lab cure | 22 | 7800 |
| 7 days at 100°F/21 in lab cure | 26 | 7400 |
| 1 day air/27 days moist | 8 | 9200 |
| 3 days air/24 days moist | 11 | 8900 |
| 7 days air/21 days moist | 18 | 8200 |
*NRMCA Publication No. 179
Various improper testing practices can cause strength reductions in test cylinders as demonstrated in this National Ready Mix Concrete Association table. Assuming a 10,000-psi mix strength, the reduction in compressive strength is shown for numerous situations where cylinders where not properly cast, stored, or prepared for testing.
For testing information on concrete that has already been placed and hardened, see Testing Hardened Concrete.

