- Concrete Polishing Equipment
- Get the Look - Polished Concrete Pictures
- How to Polish Concrete: Learn the basics and get a step-by-step overview
- Polished Concrete Preparation: How to clean, repair, and evaluate before polishing
- Concrete Polishing vs. Resurfacing
- Reviews of Concrete Polishing Equipment How to clean, repair, and evaluate the condition of concrete floors before polishing
- Tips on Using Polishing and Grinding Equipment
- Tips for Choosing Edge Grinders
- Selecting Dust-Collection Equipment
- Diamond Tooling: Tips for choosing the right type of diamond tooling and equipment
- Concrete Densifiers: An introduction to chemical hardeners and how they work to improve polished concrete
- 2023 Polishing Techniques: An online interview series featuring Bob Harris
Polished Concrete Preparation
How to clean, repair, and evaluate the condition of concrete floors before polishing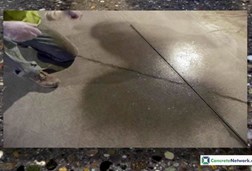
Polished Concrete Preparation: Repairing Cracks & More
Time: 03:36
Get advice on how to repair minor floor imperfections prior to polishing. Repairs may include rebuilding joints, dealing with craze cracking, filling pits and voids, color matching with dyes and more.
In all likelihood, the condition of the floor you’ll be polishing will have more impact on the final results than any other aspect of the project. It’s the key factor influencing the type of equipment and diamond tooling to use, the time and labor required to complete the job, the grit you should start with, the amount of densifier needed, and the production rates of your equipment and crews.
Determining concrete hardness
The degree of hardness, or density, of the concrete is the chief factor determining the type and grit of diamond to use. To determine concrete hardness, use a scratch test kit based on the Mohs scale of relative mineral hardness. This easy test makes it simple for you to determine where the concrete substrate ranks on the Mohs hardness scale and help you choose the most efficient and cost-effective diamond tooling for the job.
Cleaning the floor
If the concrete floor has pre-existing oil stains, you’ll need to remove them first because they will inhibit the penetration of densifiers, dyes, and stains, resulting in unwanted color variations. Degreasers and detergents are usually sufficient for removing lightly soiled areas. For heavier oil stains, try using a poultice powder-a blend of dry absorbent clay that’s effective at extracting stubborn oil and dirt stains from concrete. For light oil stains, you can also try pouring mineral spirits onto the stain and then absorbing it with kitty litter.
Related: How to Apply Concrete Densifier
On some projects, you may need to remove vinyl tile or asphaltic adhesive membranes from the concrete surface prior to grinding. If vinyl tile needs to be removed from a large area, the most efficient method is to use a ride-on machine specifically designed to scrape the tile off the surface. These machines are useful for removing a wide range of materials from concrete surfaces including thick coatings (such as epoxies or urethanes), adhesives, thin-set mortars and floor coverings.
If mastic or adhesive must be removed from the floor, the quickest method is to grind the material off, versus using a chemical stripping agent. Most manufacturers of grinding equipment and diamond tooling will have accessories designed specifically for this purpose.
Repairing chips, spalls, and cracks
When making repairs to the concrete before polishing, your goal is to blend the fix as closely to the surrounding concrete as possible. To get the best results, you must use specific products for specific repairs. (See Concrete Repair Materials.)
For chips left behind from carpet tack strips, small divots and spalls, you can choose from a variety of different cement-based patching compounds, depending on the depth and severity of the affected area. Keep in mind, though, that even the best patch may not be an identical match to the rest of the polished floor. If you are repairing colored concrete, use a patching product that can be tinted to match the desired color.
For minor flaws no deeper than 1/8 inch, try using a traditional skim-coat material used for overlaying concrete floors. For deeper flaws (1/4 inch or greater), use anchoring, or hydraulic, cement as a patching compound or even a self-leveling overlay if the flaws cover a large area.
When dealing with cracks, you first need to determine if they are static or moving cracks. Static cracks (sometimes called “craze cracks”) are hairline flaws that only affect the surface of the concrete. Generally, this type of crack requires little if any attention and can actually add decorative interest once the floor is colored and polished. If you want to disguise the cracks, an effective method is to apply a tinted urethane as a skim coat.
Moving cracks, also called “active cracks,” are more serious and typically must be repaired before you start polishing by crack chasing, cleaning, and filling. Crack chasing involves using a V-grooved diamond blade attached to an angle grinder or a walk-behind machine specifically designed to route out the crack. Next, thoroughly clean out the crack by removing all debris with a shop vac and then blow away any remaining dust with compressed air. To fill the routed crack, use a semi-rigid polyurea, which you can have color-matched to the floor, or apply a grind-and-fill repair material before polishing. (See Concrete Floor Crack Repair)
Cleaning and filling joints
Filling contraction, isolation and construction joints is just as important as successfully polishing the floor-not only for aesthetic reasons, but also to greatly reduce the chance of the joint edges chipping and spalling, especially in commercial settings subject to heavy forklift and other vehicle traffic. Filling the joints will also make the floor easier to clean by preventing dirt from collecting in the gaps.
The best method for the job is to fill the joints with a polyurea or semi-rigid epoxy at the beginning stages of the project. By cleaning the joints out first and then filling and ultimately grinding and polishing, any residual filler that flows out and isn’t scraped off will easily be removed during the coarse grinding step. Also, by filling the joint early, you’ll reduce the chance of chipping the joint edges during coarse grinding with aggressive metal-bond diamonds.
The depth of the joint is also important. Check the filler manufacturer’s specifications for how deep the joint needs to be prior to filling. Generally, it’s best to apply the filler material full depth from the bottom to the top of the joint and leave a slight raised crown. Use a razor blade to scrape off the crowned filler flush with the floor surface after the material has set, and then proceed to grinding.
Related resources:

 Polishing Diamonds
Options for hard, medium, and soft concrete.
Polishing Diamonds
Options for hard, medium, and soft concrete.
 CPS G-170 Electric
17" Floor Grinder 230 volt ($7,600)
CPS G-170 Electric
17" Floor Grinder 230 volt ($7,600)
 Propane Concrete Polisher
Concrete Polishing HQ
Propane Concrete Polisher
Concrete Polishing HQ
 Scanmaskin Diamond Tools
A wide variety of different sizes and hardness
Scanmaskin Diamond Tools
A wide variety of different sizes and hardness
 Lythic Densifier XL
1 Gallon & 5 Gallon sizes
Lythic Densifier XL
1 Gallon & 5 Gallon sizes

