- Stenciling Floors Home
- Stenciled Floor Pictures
- How to Stencil Concrete Floors
- Creative Ways to Use Stencils
- Stenciling Design Ideas
- Concrete Logos and Graphics: Creating images in concrete
- Adhesive Stencils
- A New Way to Stencil Concrete
- Related Information
- Concrete Stencils for Exterior Concrete
- Common Questions about Concrete Floors: Are they cold? Are they loud? Are they expensive? for Exterior Concrete
Tips for Stenciling Concrete Floors
Six do’s and don’ts for ensuring a successful project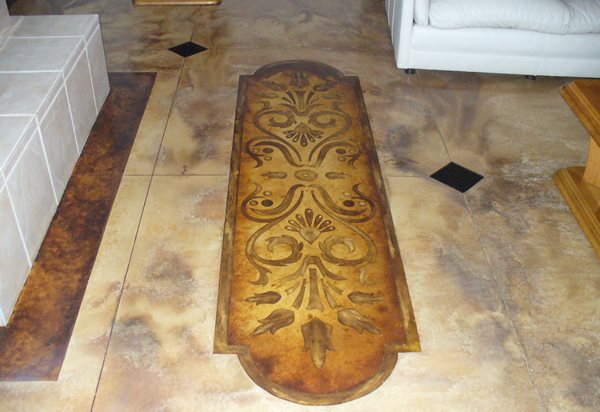
The use of adhesive-backed stencils opens up a whole new world of decorative design possibilities for concrete floors, permitting the creation of sophisticated, custom patterns in scales both large and small. Because the stencils are precut, you need very little artistic skill to produce intricate design details. However, you do need to know how to apply the stencils properly and what coloring mediums and techniques to use to achieve the best results.
“The benefit of vinyl stencils is that they can be cut to any size,” says Melanie Royals of Modello Designs, a company that produces adhesive-backed masking patterns for concrete floors and other surfaces. “For beginners, we recommend starting with smaller patterns, such as medallions, tiles, and borders. You can use them to make great focal point designs in a lobby, living room, or patio area.” Here, Royals shares some of her top do’s and don’ts for stenciling successfully.
1. Do order stencils in advance, especially if you want a pattern to be custom-cut for a specific project.“We recommend that customers plan for two weeks of turnaround time on custom patterns to allow for the time involved for customer approvals and potential revisions. The more detailed you can be with your project specifics, pattern requirements, measurements, and design theme, the faster we can turn the project around,” says Royals.
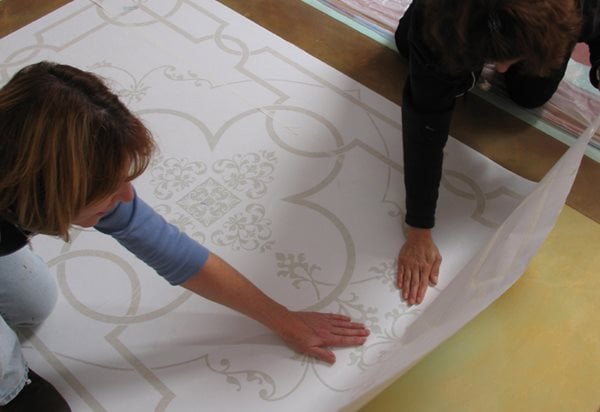
2. Don’t order stencil patterns that are too unwieldy for you to work with.Large-scale stencil patterns are generally cut into “tiles” that are laid end to end on the surface to make placement easier. However, the tile sizes can be as large as 4 by 6 feet. “At that size, it’s best to have two sets of hands for installation,” says Royals. “The difficulty in laying out large patterns is that you need to match up the tiles carefully to ensure that the pattern is laid out correctly. This is not too difficult, but it does take extra time and concentration.”
3. Do apply concrete stencils to a clean, smooth surface.Adhesive-backed vinyl stencils work best on clean, smooth surfaces. Polished concrete is ideal, according to Royals, because the tightness of the concrete keeps any stain from wicking under the stencil. For good adherence, stencils should always be applied to surfaces free of grease, oil, dirt, and dust.
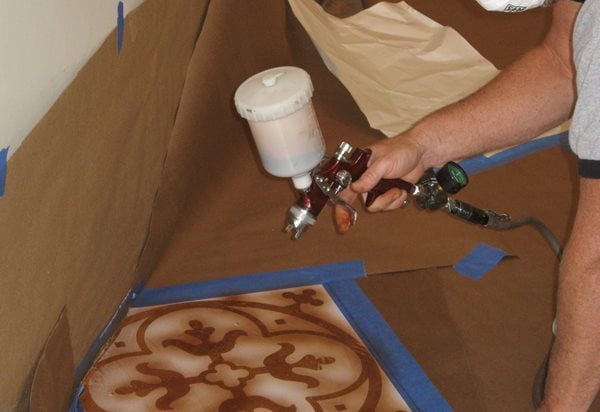
4. Don’t color stenciled designs with highly diluted stains and dyes. On porous concrete surfaces, liquid stains will get absorbed into the concrete and then wick out beyond the edges of the stencil, which sits on the surface. “Water-based stains and acid stains are best applied dry, either with a rag or brush,” says Royals. She recommends applying solvent-based dyes by air brushing because the color is dry almost the minute it hits the concrete surface.
5. Do apply multiple layers of color to achieve the best effects.You can bring out more detail and depth in a stenciled pattern by using a combination of light and dark colors. However, the order in which you apply the colors can vary depending on the technique and medium you’re using. “With translucent stains or dyes, you should layer the colors working from light to dark. With acrylic stains, which can be highly pigmented -- more like paint -- you can layer lighter colors of stain over darker colors. This will add a lot of depth to your pattern,” says Royals.
6. Don’t remove the stencil too soon.When creating embossed stenciled designs by applying a thin overlay, you should not pull up the stencil until the overlay has dried completely. Otherwise, you risk damaging the pattern as you remove the stencil. “Most microtoppings are very flexible at first and then harden as they cure,” says Royals. “In most cases it’s best to pull up the stencil within 24 hours, depending on the product used.”
For more advice from Royals on working with adhesive-backed stencils, read A New Way to Stencil Concrete.

